You can also choose if you want to start a meeting right away instead of scheduling it for later.
# How to schedule Teams meetings in Outlook. When you need to create Team meetings in your Outlook calendar. ## Outlook on the Desktop 1\) Open Outlook and switch to the **Calendar** view. [](https://docs.northshorecollege.edu/uploads/images/gallery/2022-10/GQ9rvAHtEAD3f6U5-image.png) 2\) Select **New Teams Meeting** at the top of the view. [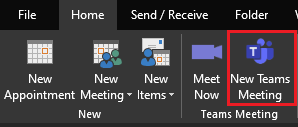](https://docs.northshorecollege.edu/uploads/images/gallery/2022-10/RhIloik7xyFfosSw-image.png)**Note:** Even if you begin by selecting **New Meeting** or **New Appointment**, you can make it a Teams meeting by selecting **Teams Meeting** at the top of the new event form.
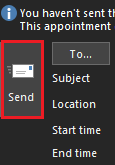
3\) Add your invitees to the **Required** or **Optional** field(s)—you can even invite entire contact groups (formerly known as distribution lists). 4) Add your meeting subject, location (if applicable), start time, and end time. 5) Create your message. [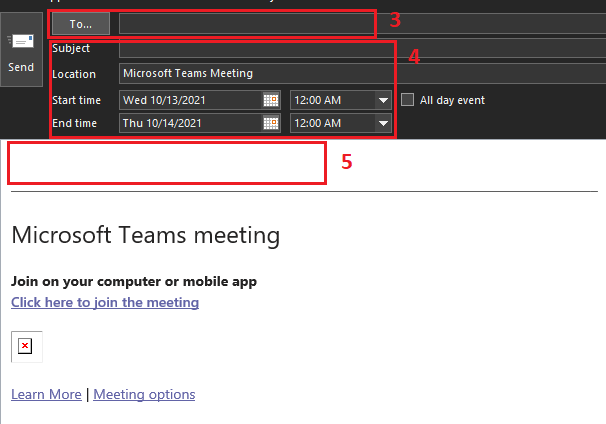](https://docs.northshorecollege.edu/uploads/images/gallery/2022-10/KyHFHCNPfX2QBYcq-image.png) 6\) Select **Send**.**Note:** The Teams meeting join details are added to the meeting invite automatically.
[](https://docs.northshorecollege.edu/uploads/images/gallery/2022-10/wzJA0DPTHEg6LVdI-image.png)If you don’t see the **New Teams Meeting** icon in the desktop version of Outlook, the Teams add-in for Outlook might not be installed properly. Please submit a ticket in the Helpdesk.
### ### Outlook on the Web 1\) Open Outlook webpage and switch to the **Calendar** view. [](https://docs.northshorecollege.edu/uploads/images/gallery/2022-10/3nnl6RUupSiykadV-image.png) 2\) Click on **New event** [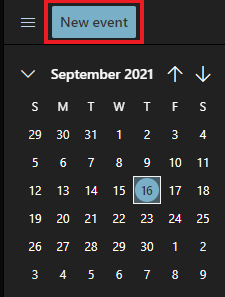](https://docs.northshorecollege.edu/uploads/images/gallery/2022-10/PEn16x120zrpba2Y-image.png) 3\) In the new event form, select the **Teams meeting** toggle to turn it on. 4\) Fill out information as needed [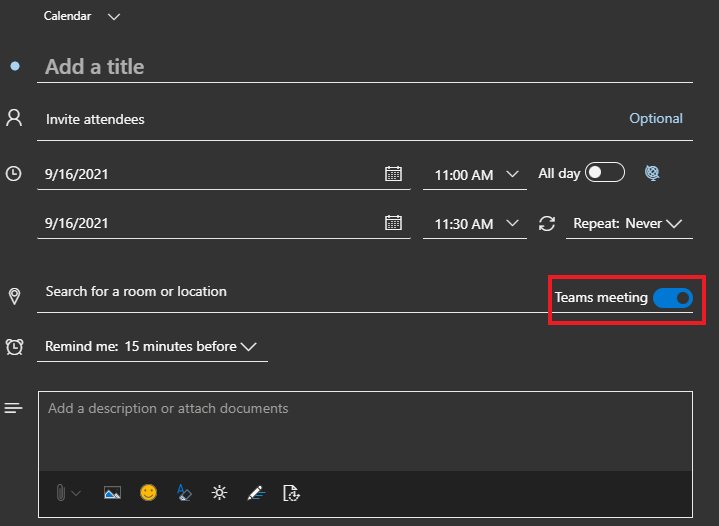](https://docs.northshorecollege.edu/uploads/images/gallery/2022-10/iKicGhuKRwGZG2AA-image.png) 5\) Click **Save** [](https://docs.northshorecollege.edu/uploads/images/gallery/2022-10/G24e1qdsQ2bchLaE-image.png) # How to set up Breakout Rooms in Teams ##### When you need to create smaller rooms inside a Teams meeting ##### ##### Breakout rooms are a great way for an organizer of a Teams meeting to split attendees into multiple online rooms for discussion and collaboration in small groups. ##### This **[How to use breakout rooms in Teams meetings](https://support.microsoft.com/en-us/office/use-breakout-rooms-in-teams-meetings-7de1f48a-da07-466c-a5ab-4ebace28e461)** guide goes over how to create a breakout room and join one. # How to set up Microphone/Speakers in Teams. To setup or change how you talk and listen in Teams. ### Pre-Call Set Up 1\) Select **Settings and more** to the left of your profile picture at the top of the app, then select **Settings>Devices.** [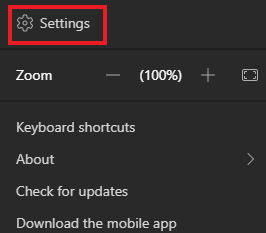](https://docs.northshorecollege.edu/uploads/images/gallery/2022-10/lD19I1M1roX0hZMS-image.png) 2\) You will see a several options with drop down selections. [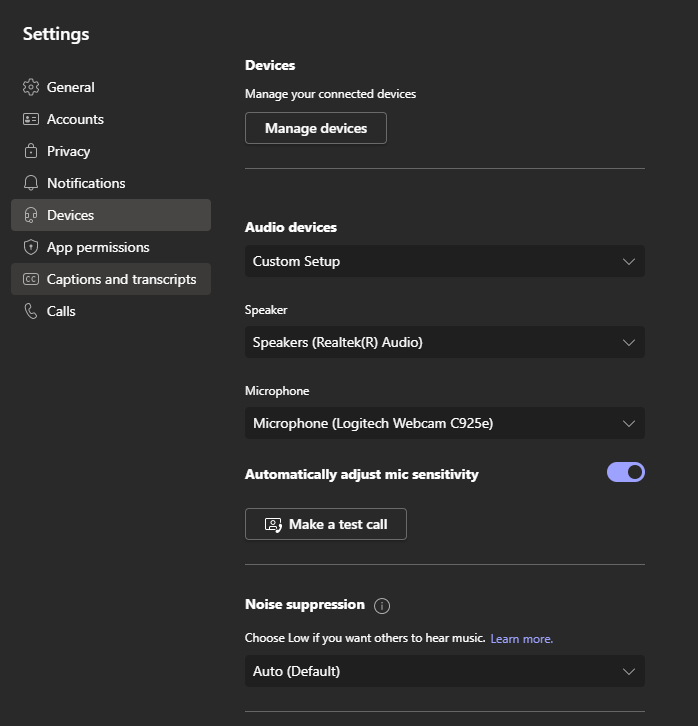](https://docs.northshorecollege.edu/uploads/images/gallery/2022-10/5Uf1FOanYWEeZ1gw-image.png) 3\) Click on the drop down menu for the device you wish to change. 4\) Select your choice. [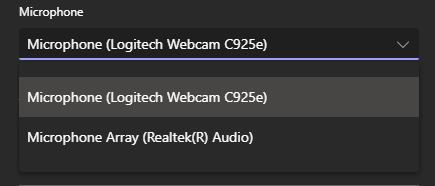](https://docs.northshorecollege.edu/uploads/images/gallery/2022-10/9Yj8esUAS8upNzoI-image.png) 5\) **Optional**: Make a test call to hear how your devices sound. [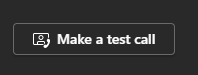](https://docs.northshorecollege.edu/uploads/images/gallery/2022-10/qfKvz2xPWl1PKnu3-image.png) ### Set Up When Joining A Call 1\) In the waiting room before a call, click on **Open Device Settings.** [](https://docs.northshorecollege.edu/uploads/images/gallery/2022-10/XItfANMJmsznWXOT-image.png) 2\) You will see various setting options depending on your computer set up. [](https://docs.northshorecollege.edu/uploads/images/gallery/2022-10/f49W7rzcTbWjEif8-image.png) 3\) Click on the drop down menu for the device you wish to change. 4\) Select your choice. [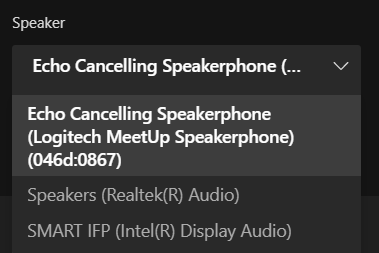](https://docs.northshorecollege.edu/uploads/images/gallery/2022-10/spouoKA4TyDve334-image.png) 5\) Click on **Join now** to enter the call. [](https://docs.northshorecollege.edu/uploads/images/gallery/2022-10/AxTYbbTgWOG1rGuC-image.png)Smartboards are labeled as **SMART IFP**. Large cameras in select rooms are **Logitech MeetUp**.
# Sharing Teams Recordings When you want to share your Team recordings. ### To share a recording from Team through OneDrive. 1.) Log into GatorMail like normal and click on the 9 dots at the top of the webpage. [](https://docs.northshorecollege.edu/uploads/images/gallery/2022-10/mmEJANSLgNzMHDCA-image.png) 2.) Go to OneDrive [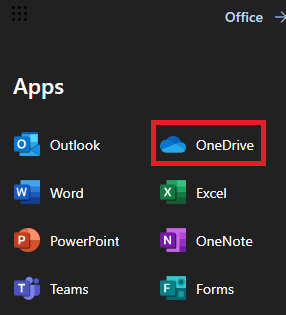](https://docs.northshorecollege.edu/uploads/images/gallery/2022-10/IlN3xGyC2NQpuTvz-image.png) 3.) Find the Recording you wish to share. When hovering over the name of the file, click on the curved arrow icon [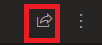](https://docs.northshorecollege.edu/uploads/images/gallery/2022-10/uY2zpEeDrepfkPxx-image.png) 4.) Click on the **Anyone with the link can edit**. [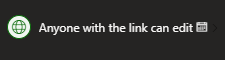](https://docs.northshorecollege.edu/uploads/images/gallery/2022-10/ZkUmEzMzISs6oV0a-image.png) 5.) A selection of options will appear. Here you will make your adjustments such as: - Who will have access to the link. - When the link will expire. - Any passwords you wish to have enabled - If editing is allowed.**Note:** Per policy, all links will expire after 90 days if the **Anyone with the link** options is chosen. You will have to resend the link if you wish for someone to continue to have access. This does not apply to the to the other access options.
6.) Select **Apply**. [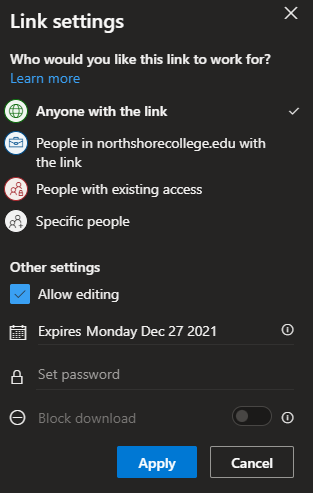](https://docs.northshorecollege.edu/uploads/images/gallery/2022-10/oTNWeRuHwxnu9Jam-image.png) 7.) Add the people you wish to send the link too. If they are within the college system then you can search by typing their name, otherwise add their email. Select **Send.** [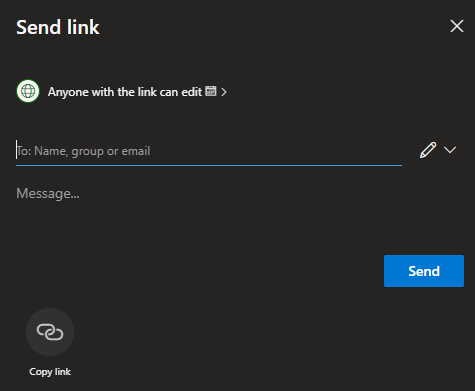](https://docs.northshorecollege.edu/uploads/images/gallery/2022-10/Ub8f88mECP0y9qQU-image.png) #### **Recovering a Recording that appears to be missing.** 1.) Go to OneDrive after signing into GatorMail. 2.) Click on Recycle Bin. [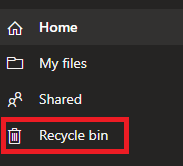](https://docs.northshorecollege.edu/uploads/images/gallery/2023-03/5eNZBdHPC92tGx7p-image.png) 3.) Right click on the item you wish to restore. [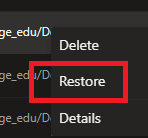](https://docs.northshorecollege.edu/uploads/images/gallery/2023-03/iDqfXgLdj0FZzu49-image.png) 4.) Your recording or file will be returned to the proper location.