Services
- Printing and Copying
- Associate College ID with Papercut/Gatorprint
- How to use Follow-Me printer
- How to use the Kyocera Staple/Punch
- Teaching Assistant on Copiers
- Copier paper jam and other technical issues.
- Student Worker Printing
- Email/Office 365
- What is my student email address?
- How do I log into my NTCC email account?
- How long can I use my student email address?
- OneDrive
- How to open a shared email mailbox.
- How to create a signature in Outlook
- How to create a Contact List in Office 365
- How to create an Out of Office message in Outlook
- How to use Outlook to search employee phone numbers.
- Reserving Rooms and Vehicles
- How to view Rooms calendar.
- What is my NTCC employee email?
- Scheduling Recurring Events
- Organizational Chart
- Teams
- How to schedule a meeting within Teams.
- How to schedule Teams meetings in Outlook.
- How to set up Breakout Rooms in Teams
- How to set up Microphone/Speakers in Teams.
- Sharing Teams Recordings
- Wifi/Internet
- Guest wireless internet (WiFi)
- NTCC VPN
- How to connect to a cellular hotspot.
- Forgetting previous WiFi.
- How to find Shared Drives.
- What do I do once I get an IT purchase quote.
- Restoring files and folders.
- Helpdesk
Printing and Copying
Associate College ID with Papercut/Gatorprint
Before you can use copy machines located on campus, you will need to associate your NTCC ID with Papercut/Gatorprint. The process is quick and easy and only has to be done once, unless you lose or damage your ID. Once you associate your card on one copy machine, you will be able to log into any copy machine Collegewide by simply tapping your card to the reader.
Warning
You MUST complete the process from start to finish in approximately 75 seconds. If you do not complete it in the required timeframe, you will not get the success message at the end and will be back at the main screen for the copier. If this happens, you must complete the entire process over again.
Step-by-step guide
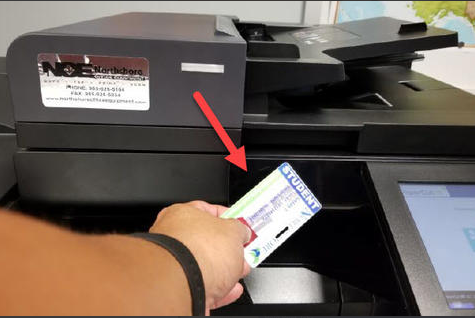
- Tap your student ID card to the student copier reader located to the left of the display screen. There should be a red light visible where you should tap your card.
- At the prompt to enter your NTCC email username and password, enter everything before the @ sign in your NTCC email (i.e. johndoe) and your NTCC email password. Please note, that the username is not case sensitive, but the password is.
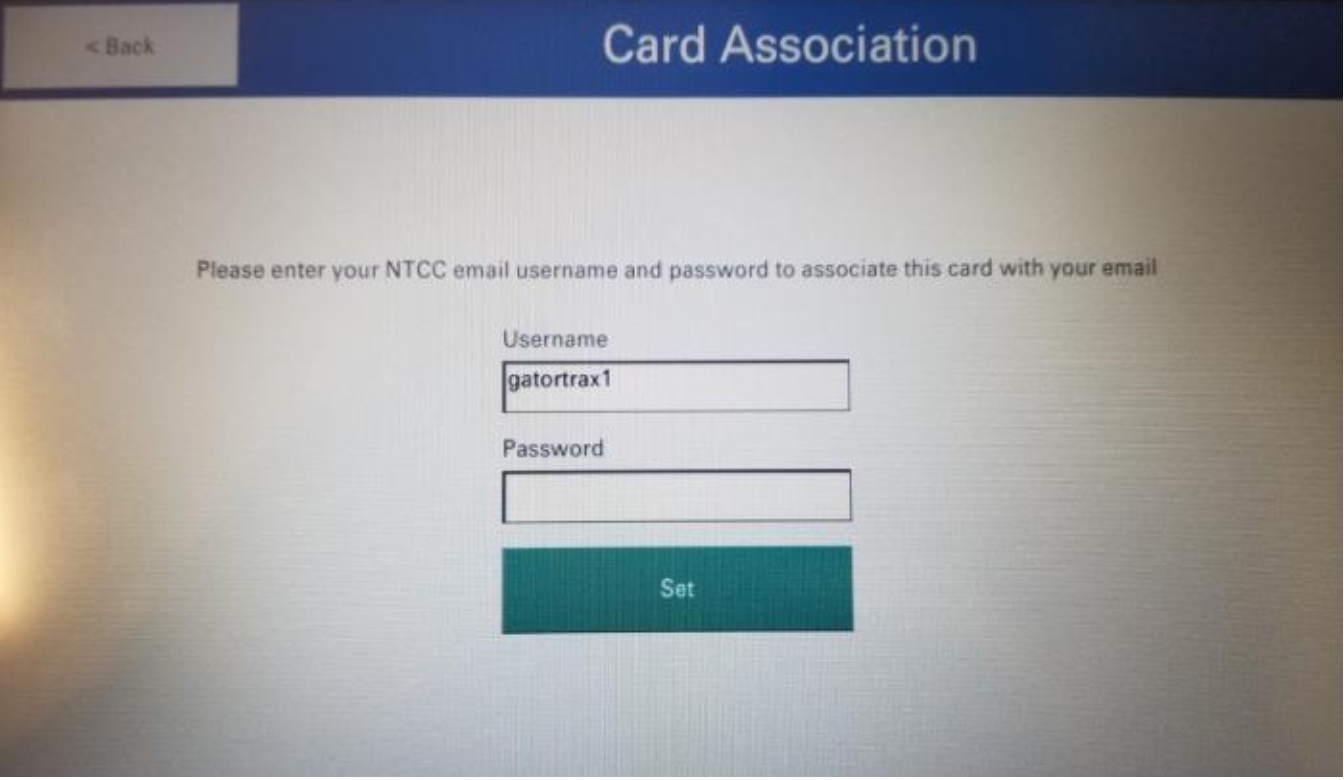
- Tap the green Set button

- You will then see a message stating "Your card has been associated with your user account." You can now log into any copier Collegewide just by tapping your card. If you did not receive the "Your card has been associated with your user account" message, you did not enter your username and password quickly enough and must start the process from the beginning.
How to use Follow-Me printer
All copiers at the Lacombe, Hammond, Livingston, Florida Parishes, and Connect to Success campuses are configured for Follow-Me printing. The copier in Administration, Health Sciences, and the Learning Commons at Sullivan campus is also equipped. The copier in the shop building and Student Services currently do not support Follow-Me
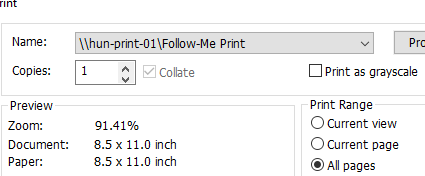
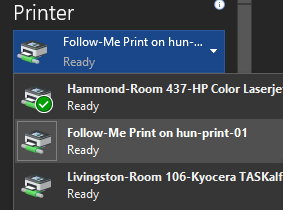
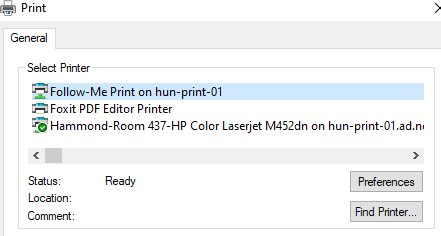
1.) When ready to print, use the drop down menu to select Follow-Me Print. This acts just like every other printer when it comes to sending the print job to a printer.
2.) Scan your ID card on any printer/copier that allows you to scan your ID card. You will need your ID card to allow the print job to be release to your chosen machine.
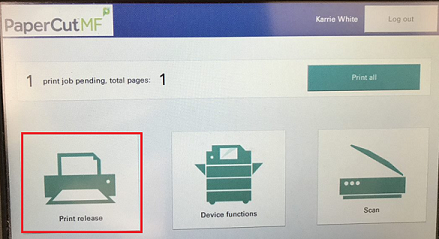
3.) On your options screen, select Print release.
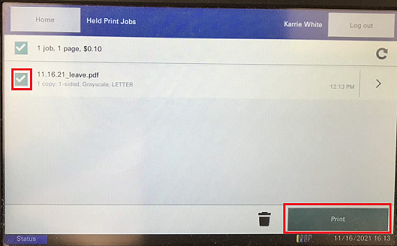
4.) Select the print job you wish to print and then select Print. Don't forget to logout!
Note: You can have multiple jobs sent and choose which ones you want to print. This can be very handy in situations where confidentiality is needed as it allows you to print only when you are at that copier.
If you get the PCL error after printing, try printing without duplexing (back and front) and staples. Follow-me sometimes has issues handling these requests.
How to use the Kyocera Staple/Punch
Kyocera copiers use special staples. Please do not try to load any other kind of staples.
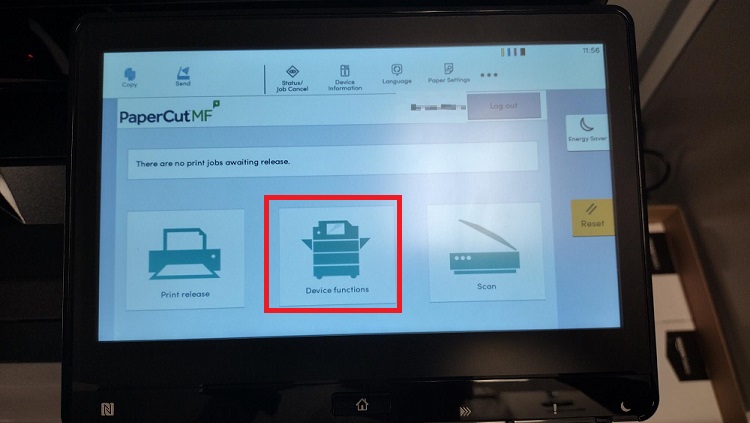
On the Kyocera physical copier.
1.) Scan your ID card to access the print screen.
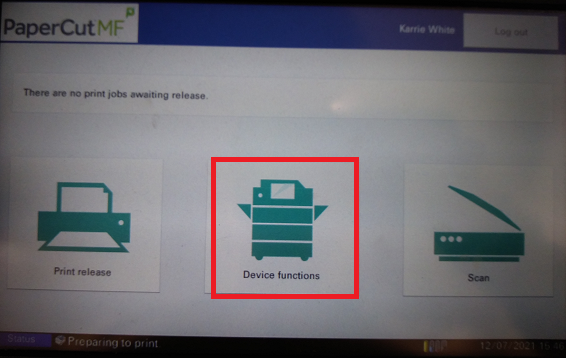
2.) Select Device Functions and go through the prompts.
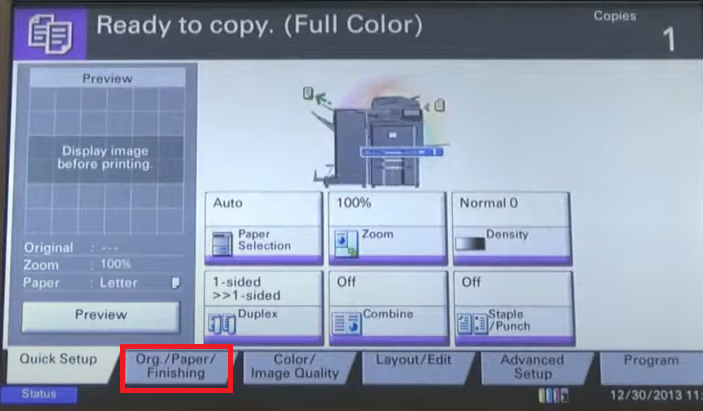
3. Select the Org./Paper/Finisher Tab.
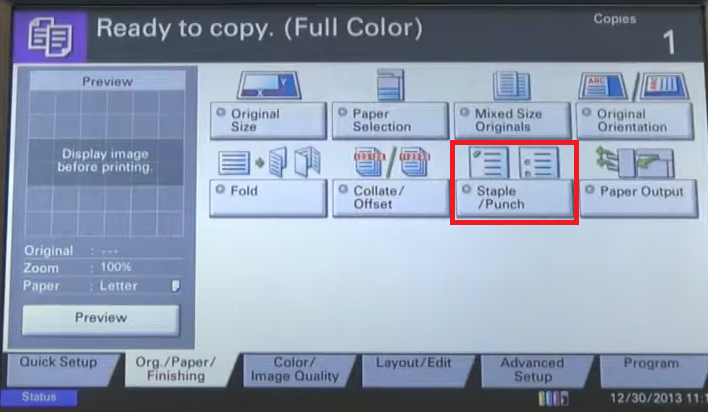
4. Select Staple/Punch function.
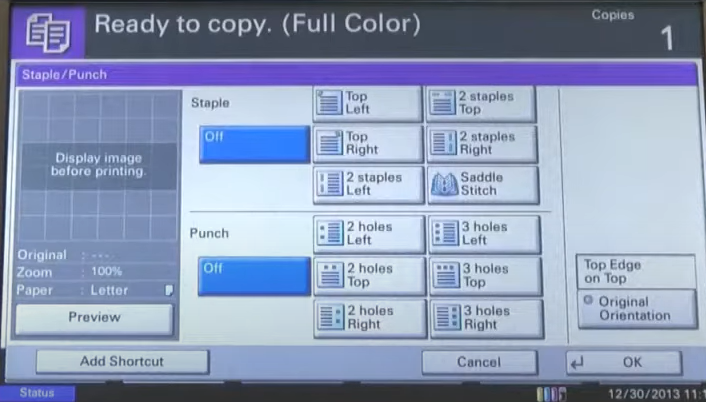
5. For staples: Select staple location. For hole punch: Select hole punch location. Both of these would depend on where you would like the staple/punch to go.
6. Select OK
7. Place originals in the document processor and press Start.
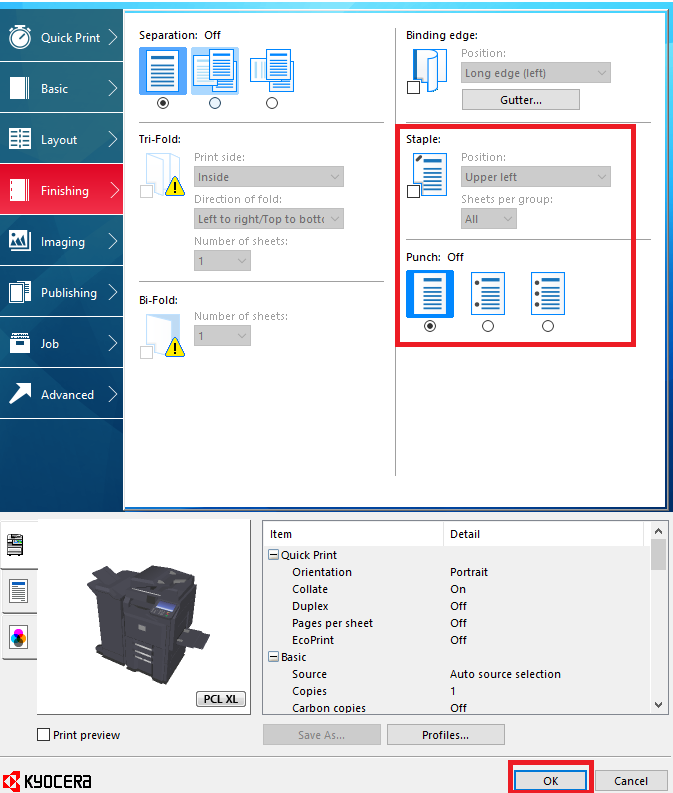
On the printer settings in the computer.
1.) When you go to print, select Printer Preference before you print.
2.) When the Kyocera printer preference screen pop ups, click on Finishing.
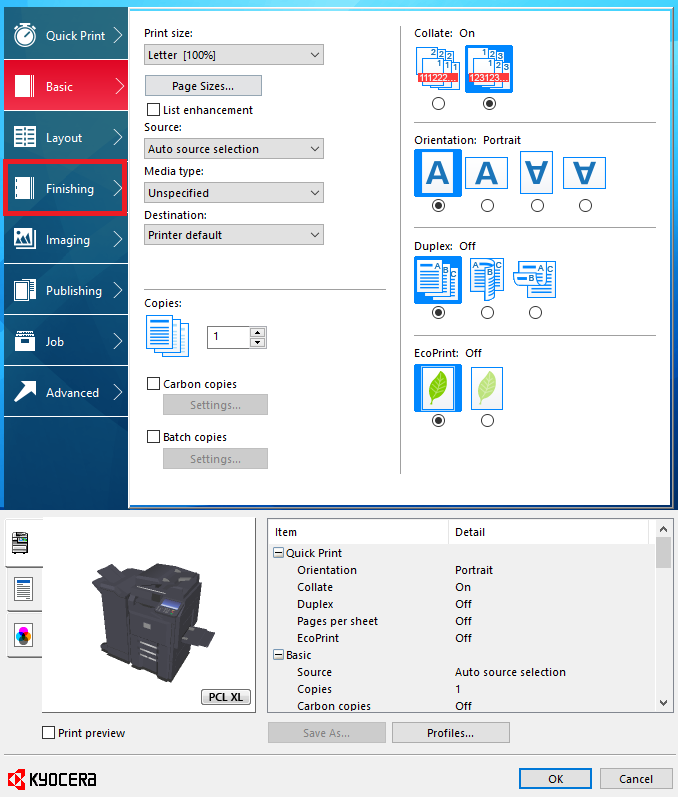
3. Choose your options for punch holes or staples. You have to enable the check box for staples if you want to use it.
4. Click OK and then print as normal.
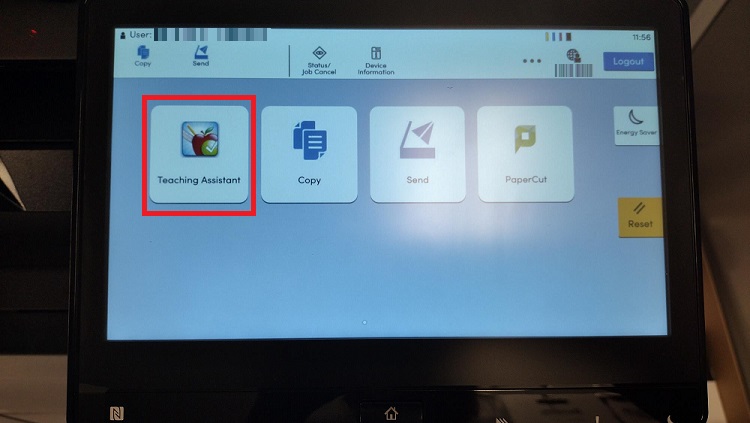
Teaching Assistant on Copiers
How to find Teaching Assistant on the new copier.
1.) Use your badge to sign into the copier.
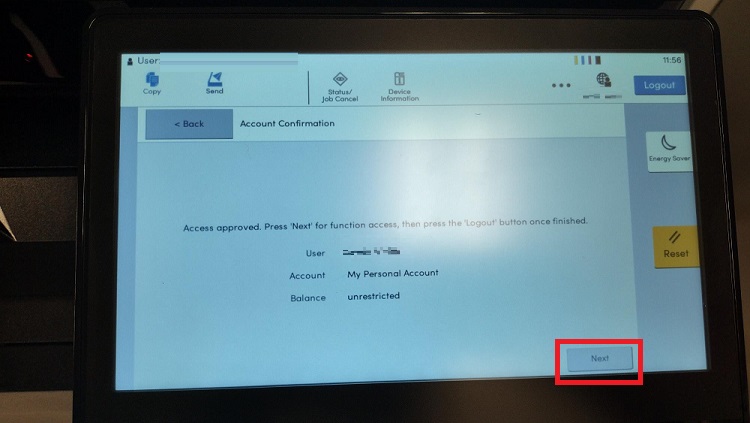
2.) Select Device Functions.
3. Select Next.
4. Select the Home button at the bottom of the screen. It is a physical button.
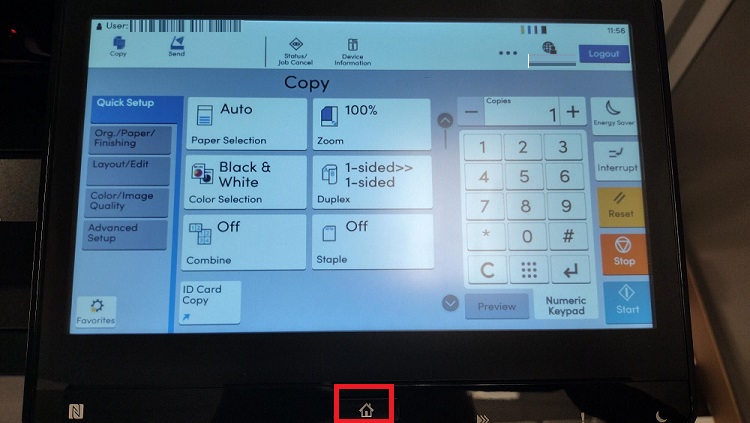
5.) Select Teaching Assistant.
Copier paper jam and other technical issues.
-
For any issue relating to the Kyocera copiers, call the number for Northshore Office Equipment listed on the silver tag on the front of the copy machine. NTCC IT does not service the copy machines.
-
If it is an issue using your ID badge to sign in or scans not sending, please submit a helpdesk ticket. Papercut service is the only function on the copiers that NTCC IT will work to correct.
Student Worker Printing
- When printing as a student worker, you must make sure Papercut is showing. You may have to click Run on a box that ask for Papercut to run.
- Print like normal, but send the print job to Follow-Me printer.
- Click on the option for Charge to shared account when the box pops up.

- Go to the copier and scan your ID card. Check out how to associate your student account with your ID.
Email/Office 365
Northshore Technical Community College uses Microsoft's Office 365 for email.
What is my student email address?
Your student email address is your LoLA user name followed by "@my.northshorecollege.edu". For example, a student named Steve Jobs would have the LoLA user name "stevejobs". His email address would be stevejobs@my.northshorecollege.edu.
Please use your full email address to log into your email.
NOTICE: Sometimes your email may contain an number behind it depending on how my other students have the same last name as yours.
How do I log into my NTCC email account?
ATTENTION: All NEW students will need to reset their password with Password Reset Tool before logging into their College email account for the first time.
To reset your password.
1.) Go to www.northshorecollege.edu and select the GatorMail link located on the top menu bar.

2.) Scroll down till you see the GatorMail Password Reset Tool. Click on the link.
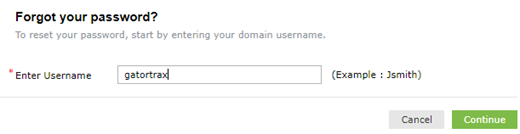
3.) Enter the part of your username that is before the @my.northshorecollege.edu. It would be the same as your LoLA username.
For NTCC faculty/staff it will be before @northshorecollege.edu.
Click Continue
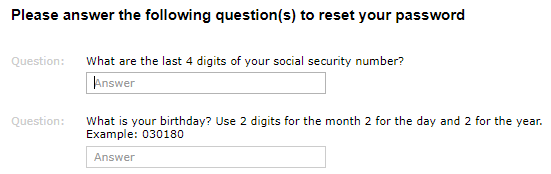
4.) Enter the last 4 of your Social Security Number in the field for the SSN
5.) For Students: Enter your birthday into the birthday field in the format MMDDYY. For example, if your birthday is July 4, 1976, you would enter 070476
For Faculty/Staff: It will generally be the 2 digit month and 2 digit day. No year.
6.) Enter the characters shown in the CAPTCHA picture and click Continue
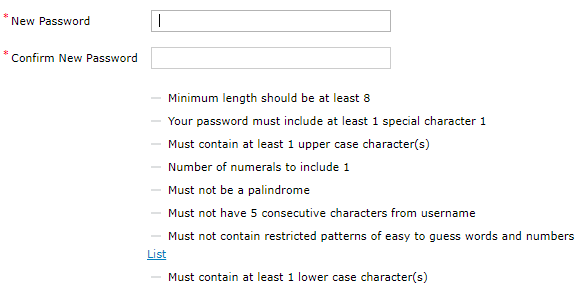
7.) Enter a password that meets all of the password requirements. When you have created a satisfactory password, all of the requirements will have a green check next to it
8.) Enter the characters shown in the CAPTCHA picture and click Reset Password.
9.) Wait 3 minutes for the password to sync to the cloud
10.) Log into your email at http://northshorecollege.edu/webmail
Reminder: Students use @my.northshorecollege.edu for their logins while Faculty/Staff use just the @northshorecollege.edu. If you are having trouble logging into your email, check to make sure this is correct.
To log into your email account.
Please allow between 2 to 5 minutes before trying to log in after you reset your password so that the email servers will have time to sync your new password. Failure to do so will show an incorrect username/password error. Too many failures will lock your account and you will have to wait 15 minutes for the account to automatically unlock.
HOW TO LOGIN STUDENT EMAIL ACCOUNT
1. Go to
www.northshorecollege.edu/webmail or
www.northshorecollege.edu and click on the GatorMail link on the home page.
2. Scroll down the page and click on the "GatorMail Login" link
2. Enter your full email address which is the same as your LoLA username + my.northshorecollege.edu (example:
LoLAusername@my.northshorecollege.edu)
3. Enter your email password (will not be the same password as your LoLA password)
HOW TO LOGIN FACULTY/STAFF EMAIL ACCOUNT
The same as the students except you will have @northshorecollege.edu instead.
You will also be prompted for your 2-Factor Authentication.
How long can I use my student email address?
You can use your NTCC student email address as long as you are a student.
-
If you are graduating soon, please save any important information prior to your graduation date.
-
Change out any accounts you have that use your student email to a personal one so you do not lose access to those accounts.
OneDrive
When you need to add files/folders to your OneDrive.
Accessing the desktop app.
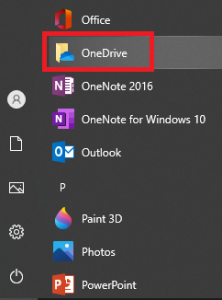
1.) Click on the Windows button and scroll till you see OneDrive.
2.) Click on OneDrive
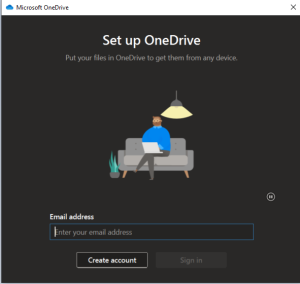
If you have not set up your desktop OneDrive, you will be prompted to do so once you clicked on OneDrive. Follow the prompts to sign in.

3.) Your desktop OneDrive will look like any File Explorer for Microsoft. What you do in your desktop OneDrive will affect your web version of OneDrive and vise versa.

Accessing the web version.
1.) Log into your GatorMail like normal.
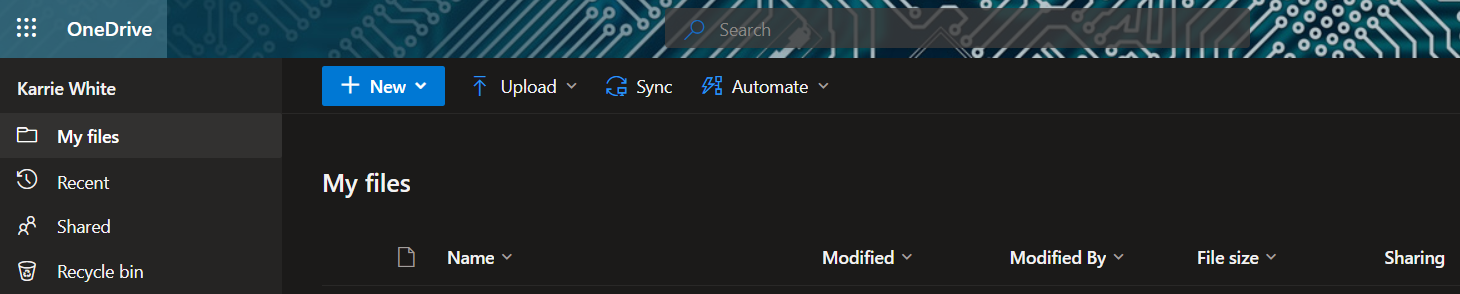
2.) Once you are in your Office 365, click on the OneDrive icon.

3.) You are now in your OneDrive and can add/remove/share files as needed.
How to open a shared email mailbox.
If you have been granted access to a shared email mailbox, you can access it from webmail easily.
1. Open your webmail. You should see your list of emails in your inbox or other folder.
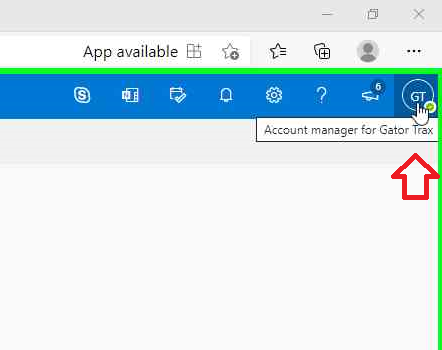
2. Click on your initials or picture in the upper-right corner of the screen (depending on whether you have uploaded a profile picture or not.
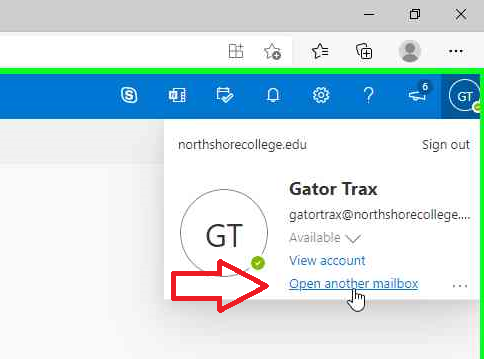
3. Click on "Open another mailbox".
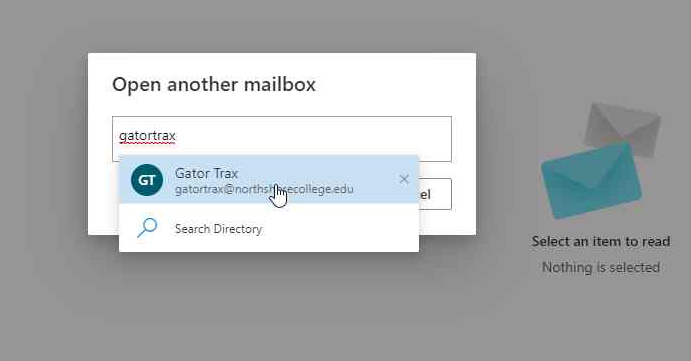
4. In the Open another mailbox dialog box that opens up, start to type the email address/name of the mailbox you are trying to open. Autocomplete should find the mailbox.
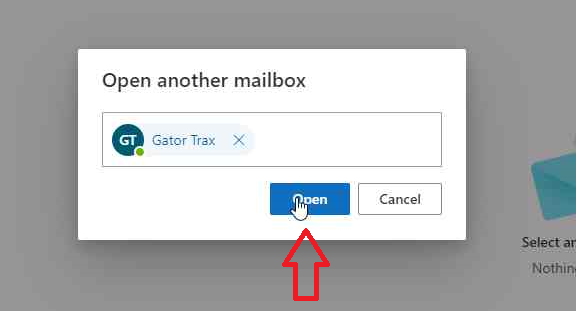
5. Click "Open" to open the mailbox
If you receive an error message like the one below that says "Something went wrong. You don't have permission to perform this action," you do not have permissions to access this mailbox. If you feel that you should have access to that shared mailbox, please have the manager of that shared mailbox submit a helpdesk ticket to request that you be given access. This helpdesk ticket must come from the manager of the mailbox. IT will not grant access to shared mailboxes without the permission of the manager who controls that mailbox. 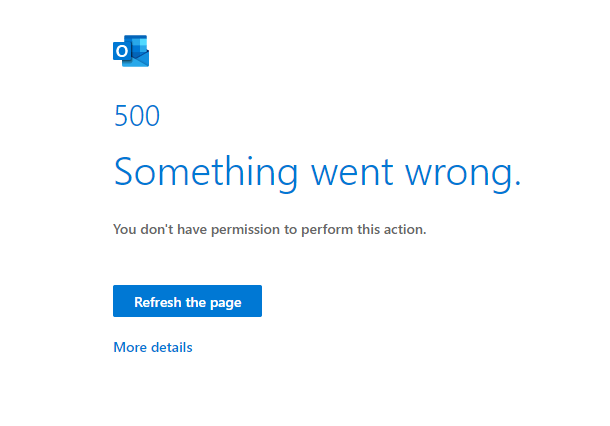
How to create a signature in Outlook
When you want to have a customized signature in your emails.
Click on images to enlarge.
Creating a signature in the desktop app.
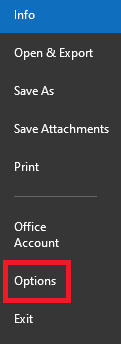
1.) After opening the Outlook desktop app, select the File tab.

2.) Click on Options.
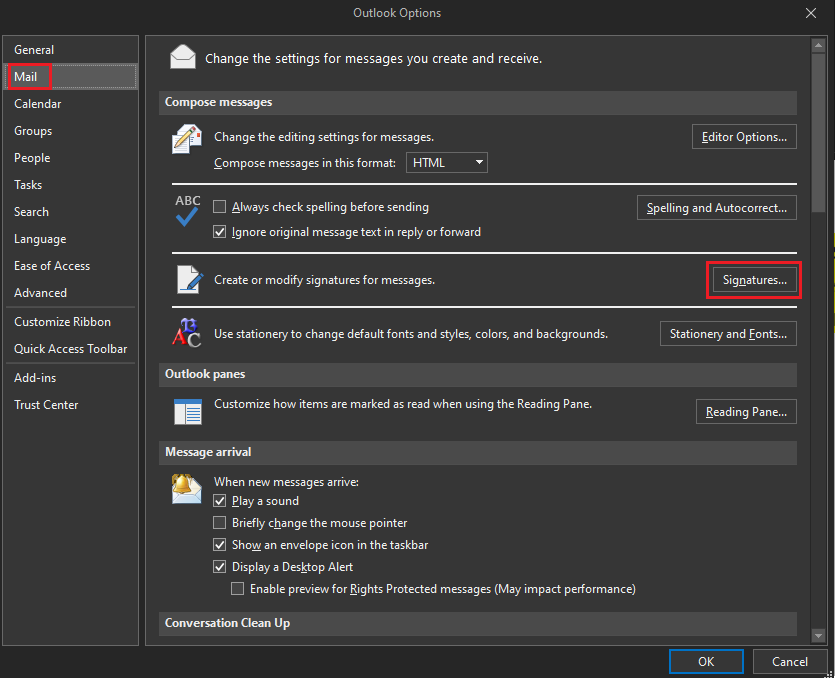
3. Click on Mail then click on Signatures.
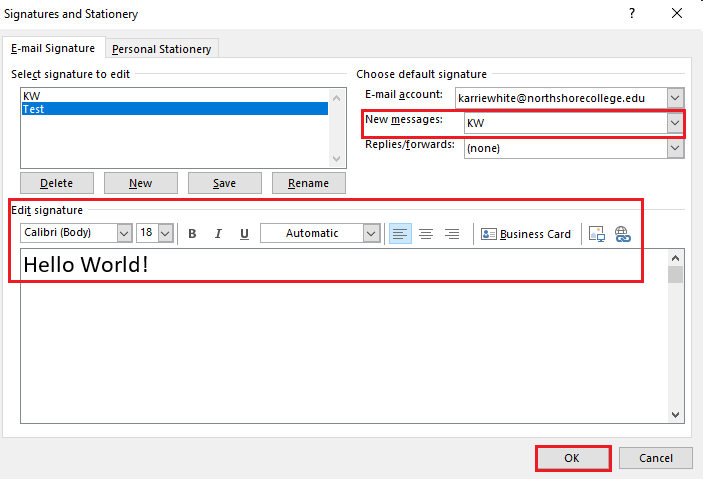
4. Click New and type what your want the signature to be called then OK.
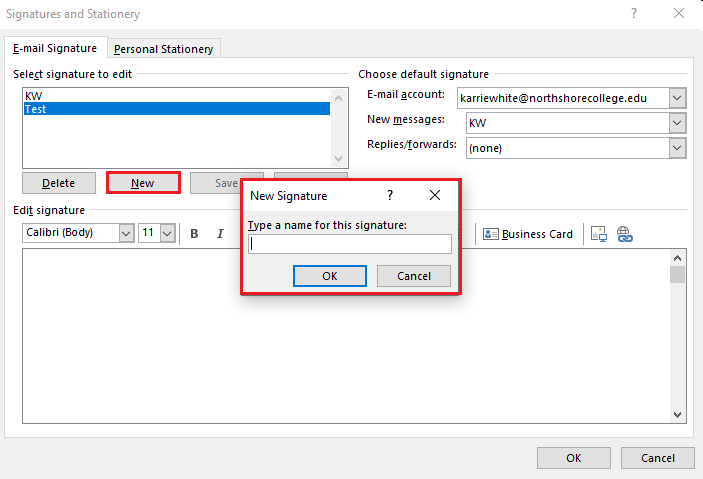
5. Write your message in the Edit signature box.
Note: Make sure you use the drop down box for New messages: to select the signature you want to use. You can also choose to have it for replies and forwards as well.
6. Click OK.
Creating a signature in the web app.
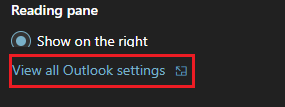
1.) Sign into Gatormail like normal. At the top right corner, select the Settings icon.
![]()
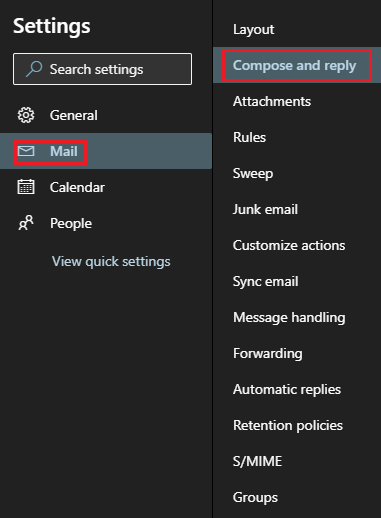
2. At the bottom of the newly opened panel, click View all Outlook settings.

3. Select Mail then select Compose and reply.
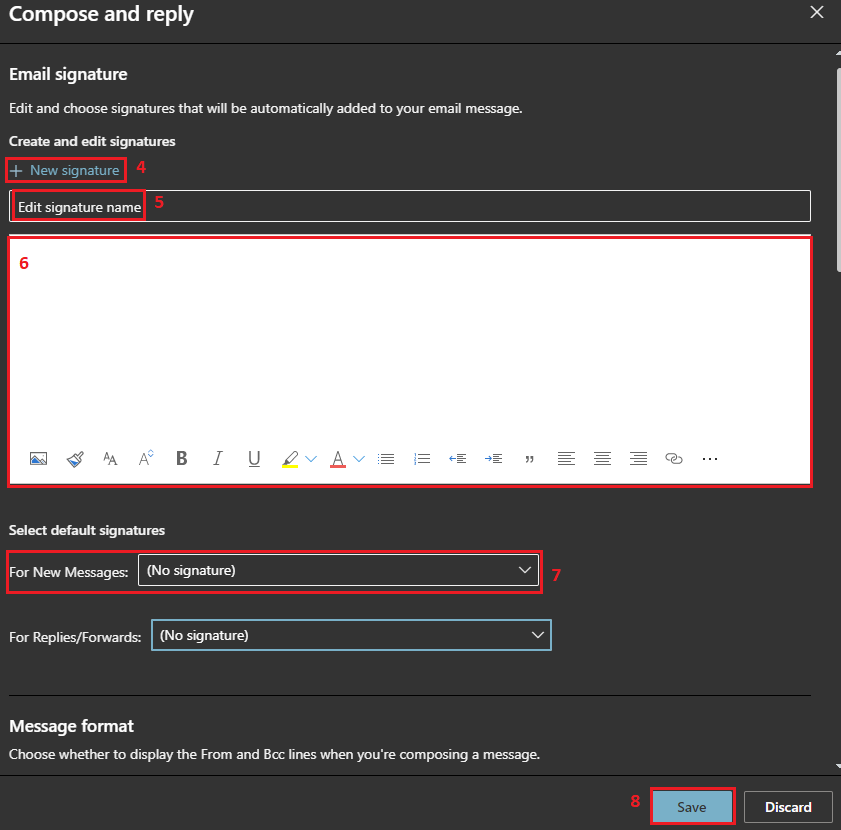
4. Click + New signature.
5. In Edit signature name create a name to identify your signature.
6. Create your message for the signature.
7. Make sure you use the drop down box for New messages: to select the signature you want to use. You can also choose to have it for replies and forwards as well.
8. Click Save.
How to create a Contact List in Office 365
Use a contact group (formerly called a “distribution list”) to send an email to multiple people
Click on the images to enlarge.
Desktop Guide
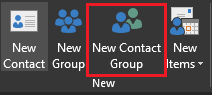
1.) Select People.
2. Select New Contact Group.
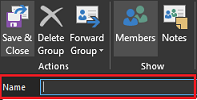
3.) Name your group.
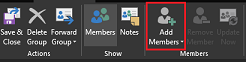
4.) Select Add Members.
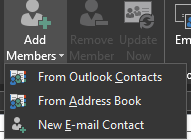
5.) Choose From Outlook Contacts to add people from your contacts.
Choose From Address Book to add people within the NTCC Global Address list.
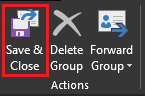
6. Save & Close
Webapp Guide
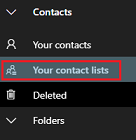
1.) Select People.

2.) Select Your contact lists.
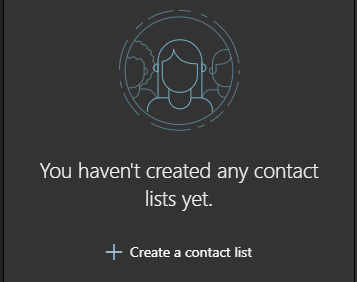
3. Select +Create a contact list.
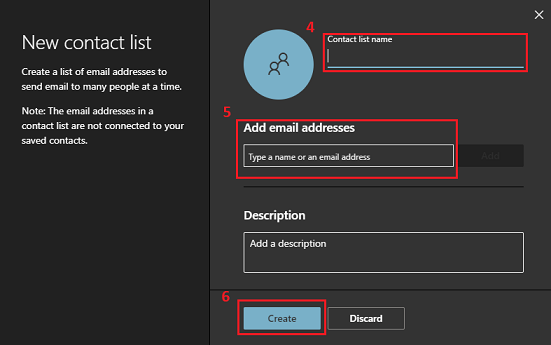
4. Name your list
5. Type the names to search and add emails
6. Create
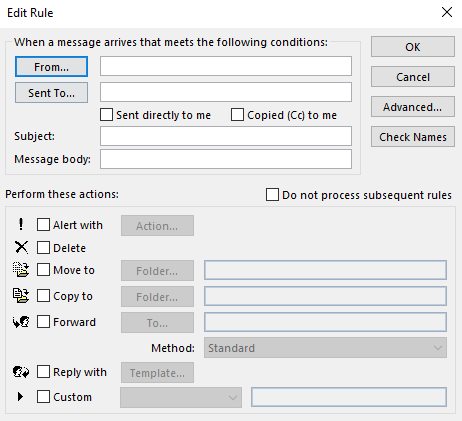
How to create an Out of Office message in Outlook
When you need to have an automated message sent when not in office.
Create an OOO on desktop app.
1.) 1. After opening the Outlook desktop app, select the File tab.
2.) Click on the Automatic Replies button.

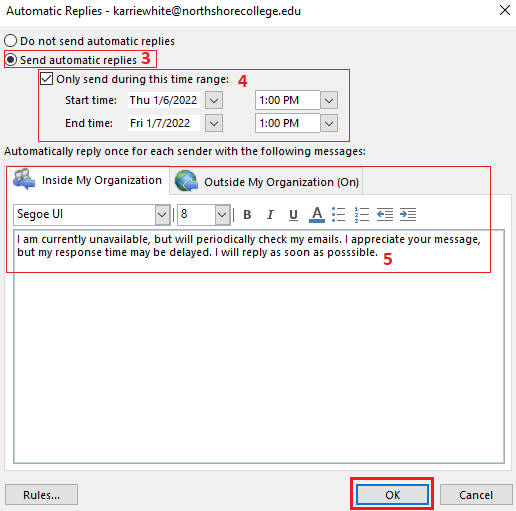
3.) Choose Send automatic replies
4.) Click the Only send during this time range: box. Then choose your dates and times when you will be out of office.
5.) Create your message.
6.) Click OK.
NOTE: Best security practice is to give as little information about your absence as possible. No locations and if possible no dates. Avoid having the Outside My Organization or a contact if possible. If not possible, continue to provide as little as information as you can.
OPTIONAL: You can set up rules for your messages. On the left hand bottom corner click Rules...
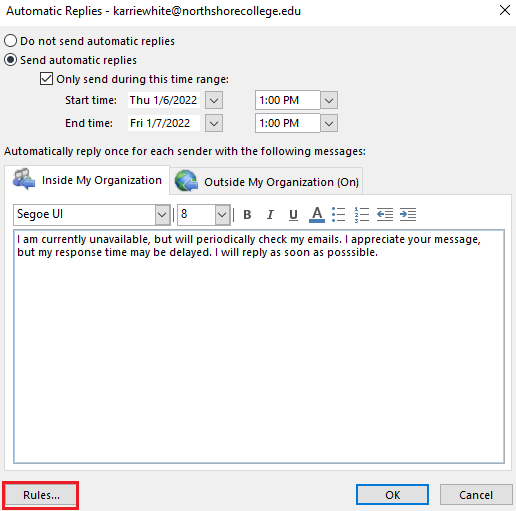
Click on Add Rule...
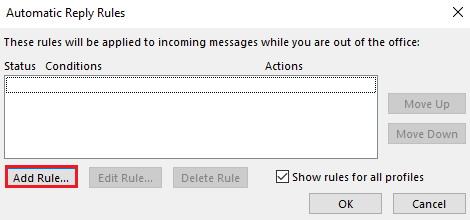
Set up the various rules you wish to have, including automatic forwarding to certain individuals. You can create multiple rules to really customize your messages.
Create an OOO in the web app.
1.) 1. Sign into Gatormail like normal. At the top right corner, select the Settings icon.
![]()
2. At the bottom of the newly opened panel, click View all Outlook settings.
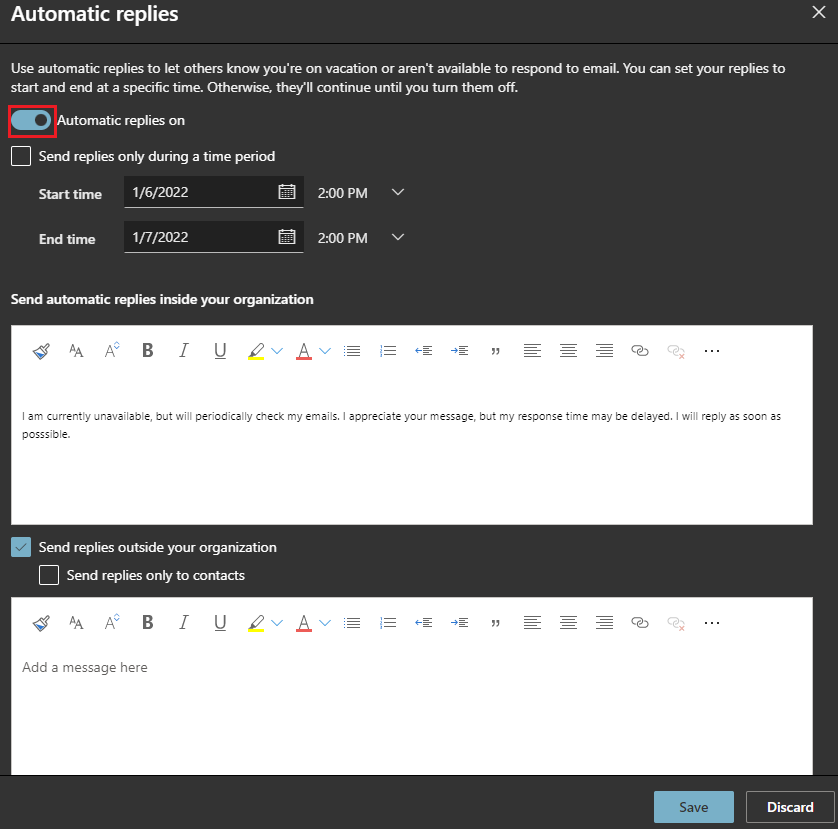
3. Select Mail then select Automatic replies.
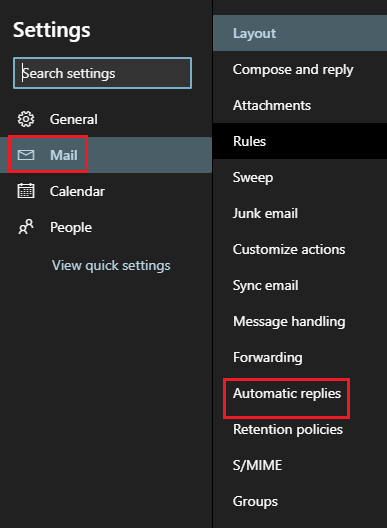
4. Click on the Automatic replies on button. Fill out like you would in the desktop app.
5. Click Save.
How to use Outlook to search employee phone numbers.
To use Outlook to lookup Faculty/Staff work phone numbers
Searching with desktop app.
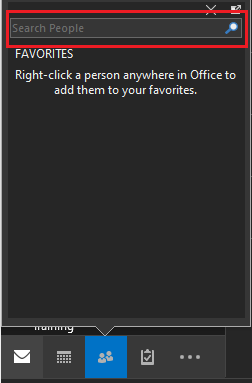
1.) Hover the mouse over People.
![]()
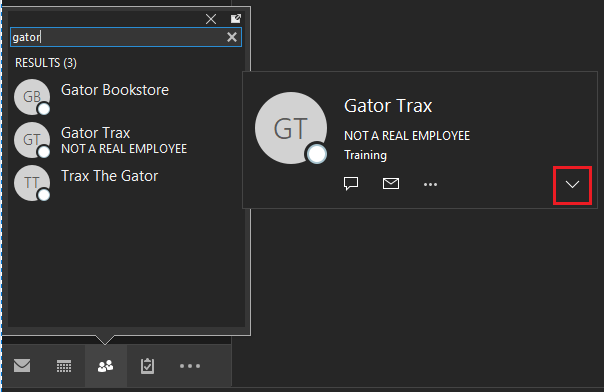
2.) In the Search People bar, type the name of the person you are looking up.
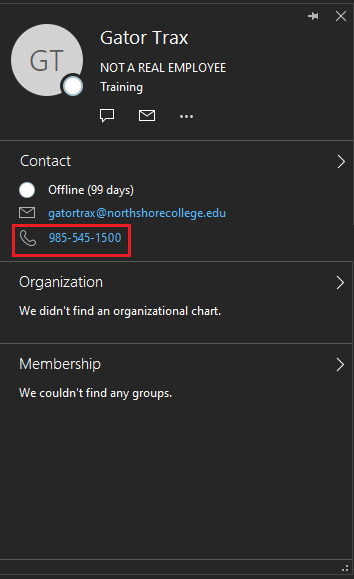
3.) Once you have started your search, you can hover over the name to expand details. Click the ▼ Open Contact Card.
4.) With the expanded view you can now see phone number.
Searching with the web app.
1.) Select People.
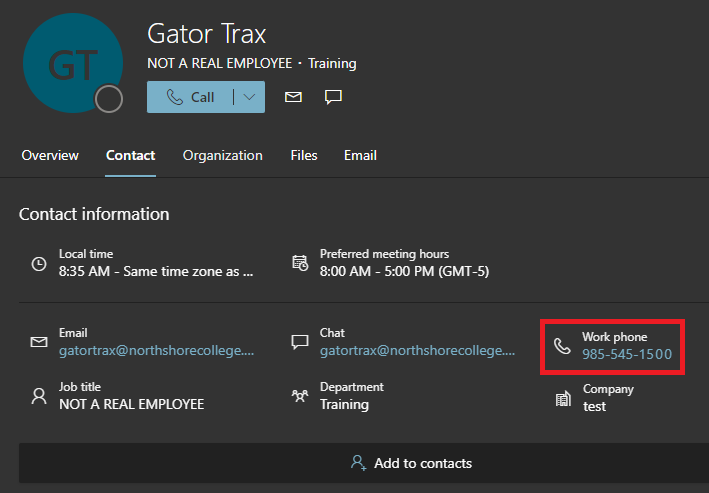
2.) Type the name of the person in the search bar at the top of the page and click on that person.

3.) Contact details are show.
Reserving Rooms and Vehicles
Students are only permitted to book Learning Commons Collaboration Rooms (currently only Lacombe-Collaboration Room 201B)
Click on images to enlarge.
Reserving through desktop app.
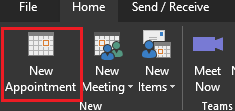
1.) Go to Calendar and select New Appointment at the top tool bar.
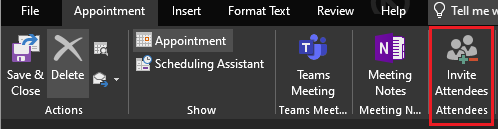
2.) Click Invite Attendees.
3. Click Rooms... at the end right-hand side of the window under Subject.
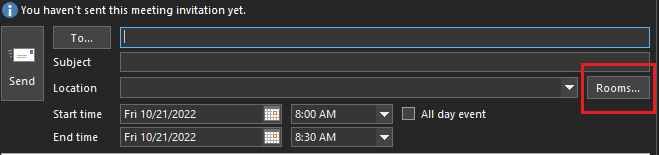
4. Select the vehicle or room you wish to reserve.
5. Click Rooms so that the bar next to it shows the one you want.
6. Click OK.
7. Fill out the rest of the details and click Send
8. Once you send the appointment, you will receive an email stating that the appointment has been set on the calendar. If the vehicle or room requires approval, the approver will receive an email notifying him or her of your request. You will be notified once the approver approves or declines the request.
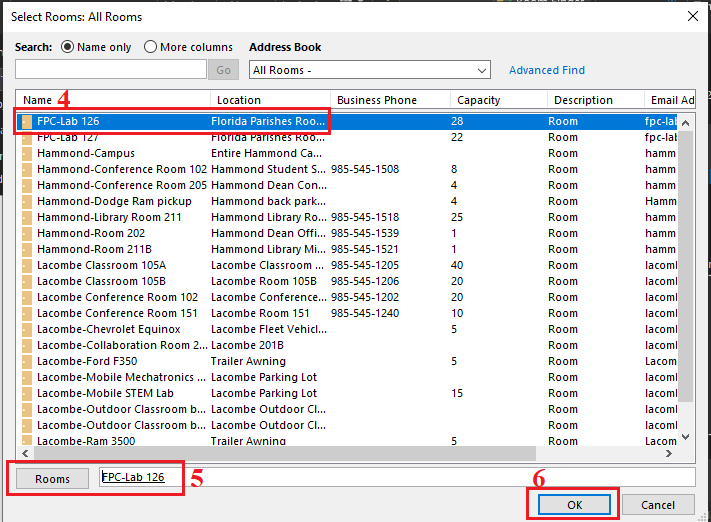
Reserving through webmail.
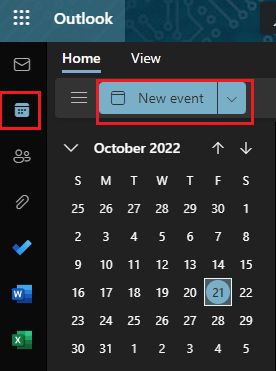
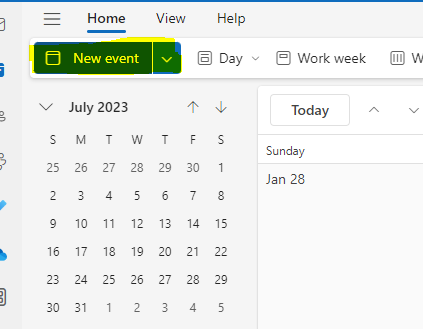
1.) In webmail, go to Calendar and select New Event at the top tool bar.
2.) Click Search for a room or location.
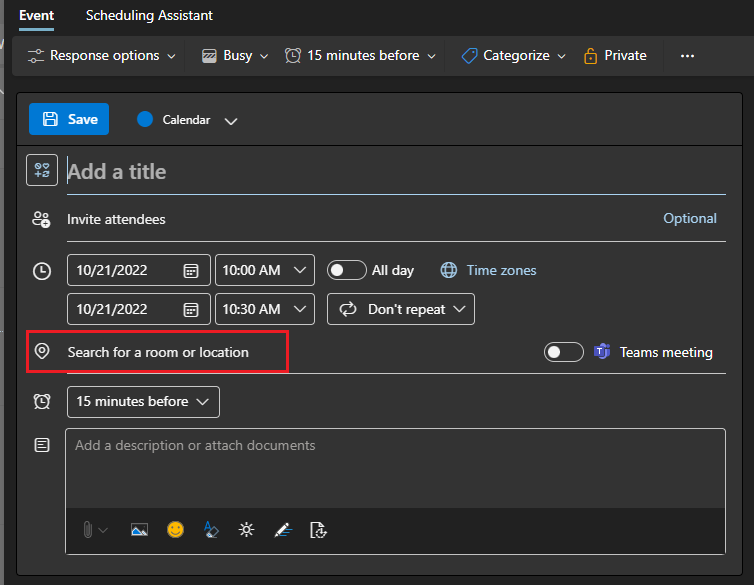
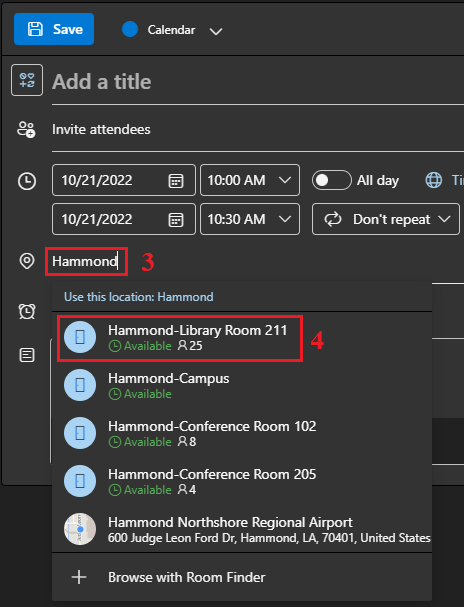
3. Type in the search bar the room or vehicle you are looking to reserve.
4. Click on the location to select it.
5. Fill out the rest of the details and click send.
6. Once you send the appointment, you will receive an email stating that the appointment has been set on the calendar. If the vehicle or room requires approval, the approver will receive an email notifying him or her of your request. You will be notified once the approver approves or declines the request.
How to view Rooms calendar.
When you want to see if a room/vehicle is available.
Using the desktop app.
1.) In the desktop app, click on the Calendar icon at the bottom.
![]()
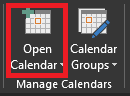
2.) At the top tool bar, click on Open Calendar.
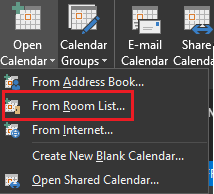
3.) From the drop down list select From Room List...
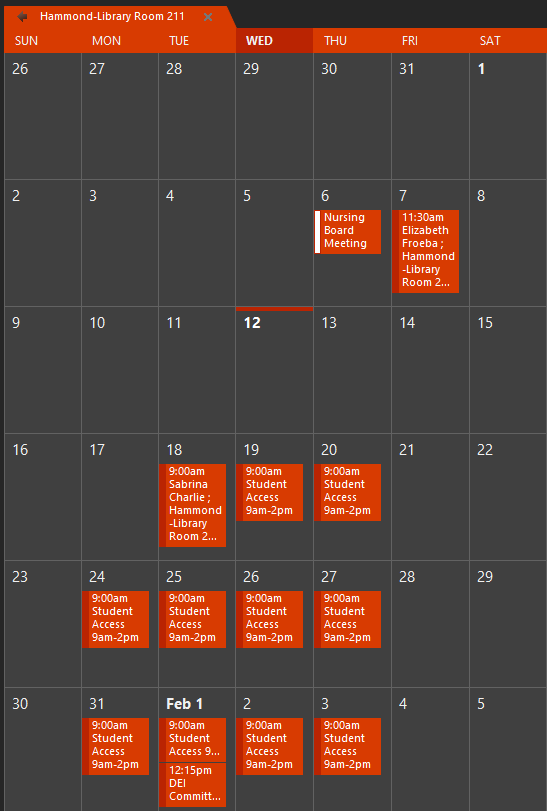
4.) Double click on room you wish to view then click OK.

5.) Now you can view the room.
Using the web app.
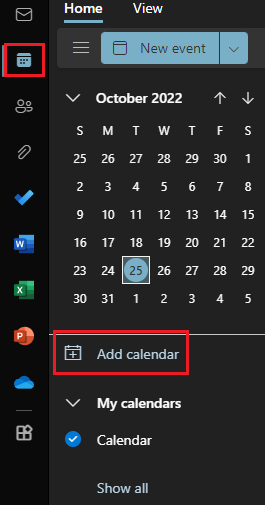
1.) In the web app, click on the Calendar icon then select Add calendar.
2.) Click Add from directory then type the name of the vehicle or room you wish to add.
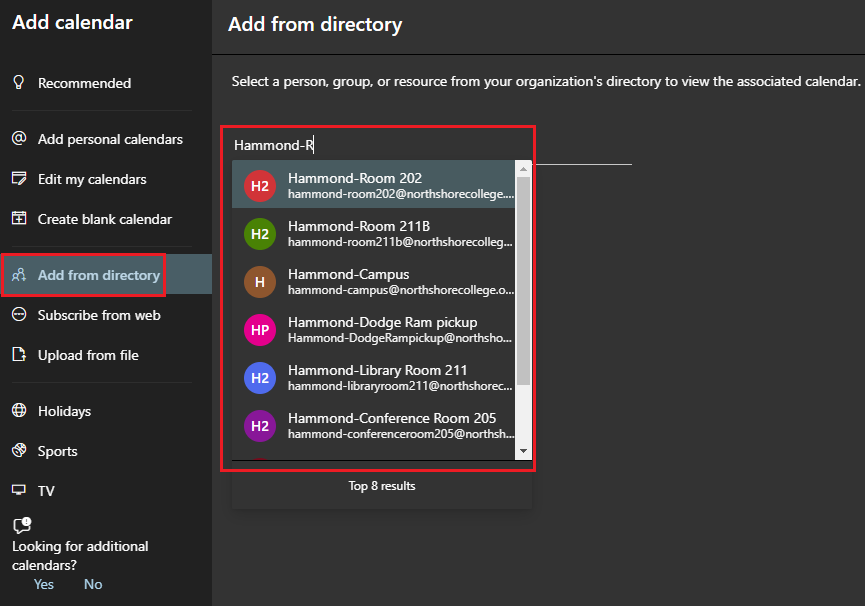
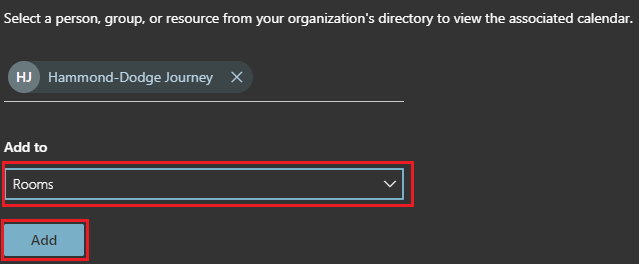
3.) Under Add to, use the drop down box to select Rooms. Click Add.
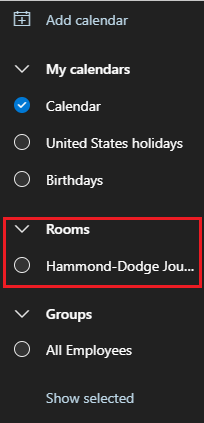
4.) You can select the calendar to view it.
What is my NTCC employee email?
-
Your email is your LoLA username+@northshorecollege.edu such as gatortrax1@northshorecollege.edu
-
Your username is the first part of your email without the @northshorecollege.edu
-
Always use lowercase for username and emails.
Sometimes your username is not the same as your LoLA. Your supervisor will inform you if this is the case.
Scheduling Recurring Events
Introduction
Scheduling recurring events is a great way to better define when an event that is spanning multiple days is occurring on your calendar. For example, a meeting that is happening Monday through Wednesday between 9am and 4:30pm.
Step-by-Step
Webmail
- Log into your NTCC webmail, then go to the calendar
- Click on New Event
-
- Select the date and times that the first day of the multi-day event occurs
-
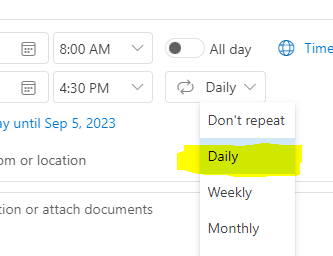
- Select Daily under the repeat dropdown
-
-
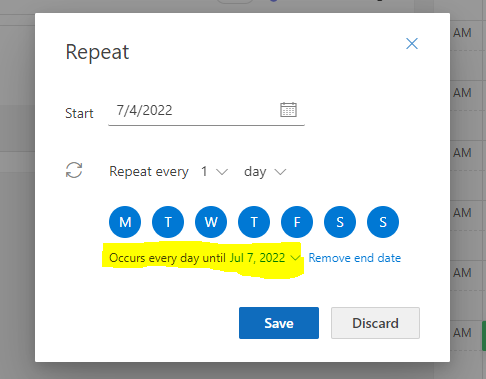
Choose to repeat the event every day applicable. Be sure to set the end date to the last day of the event
-

Organizational Chart
There may be times when you need to determine who a person reports to, or who are a person's direct reports. Office 365 has this information available. Please note that some employees have multiple supervisors. In cases where a person has multiple supervisors, only that employee's primary supervisor is listed.
Webmail
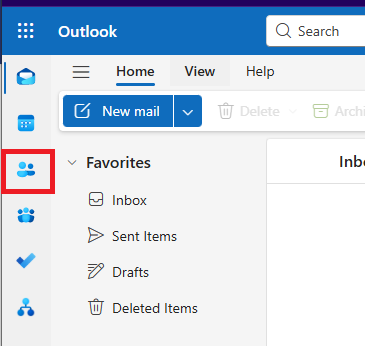
1. From webmail, click the People icon in the left-hand column
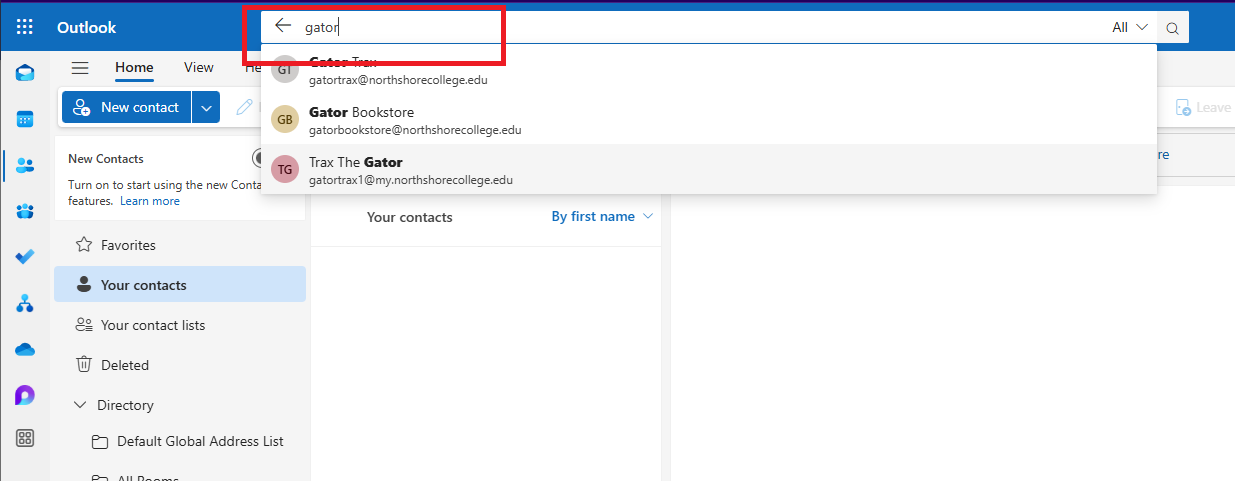
2. Use the search bar at the top of the screen to search for the desired person
3. Click on the person's name, and their contact card will show
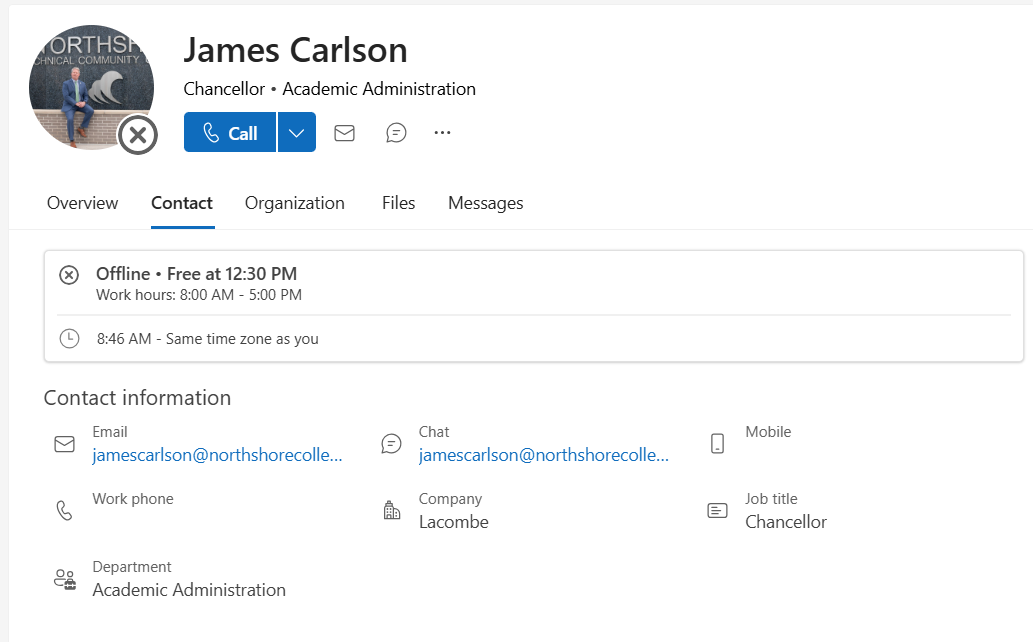
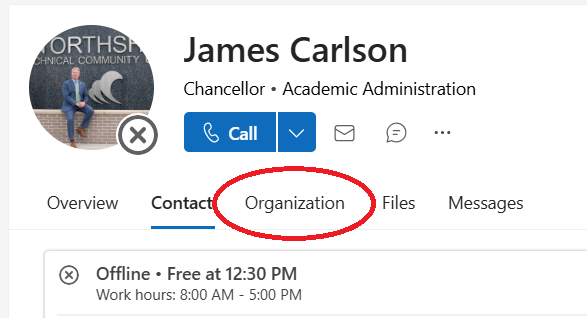
4. Click the organization button to show the organizational chart
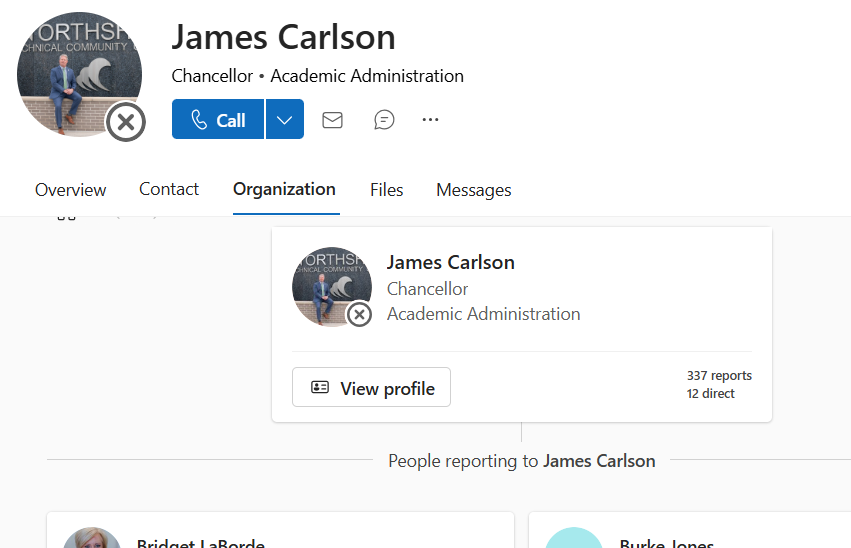
5. The organizational chart will be visible and show who the person reports to and their direct reports
Microsoft Teams Desktop
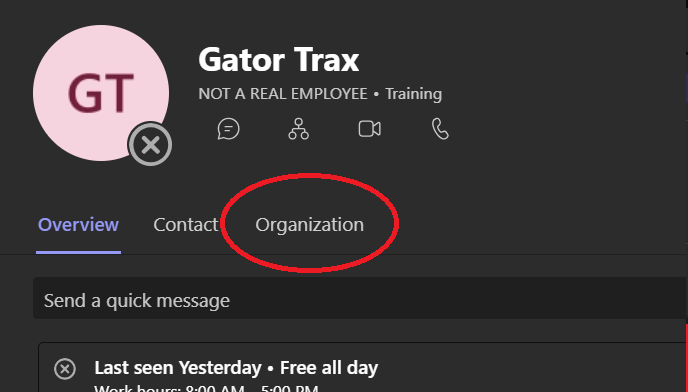
1. Open Teams and search for the person in the top search bar
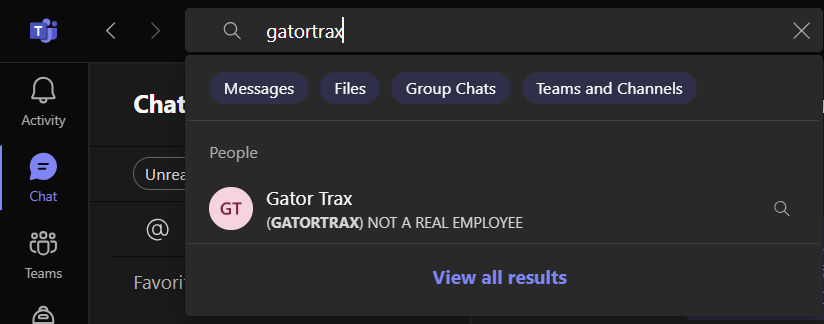
2. Click on the person's name in the results. This will bring up a chat window for the person
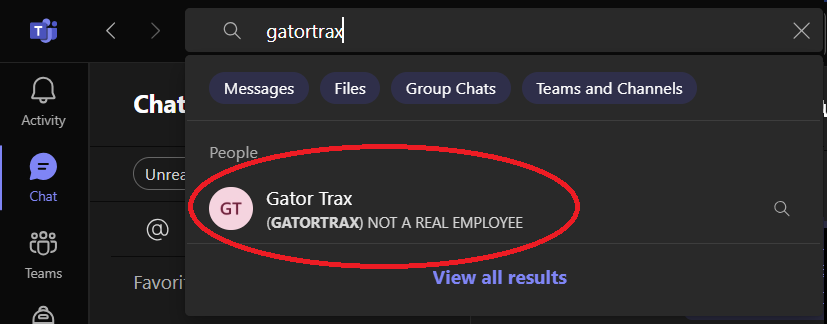
3. In the top of the chat window, click on the person's name. You may have to click on their name twice to bring up the full contact card. Click on the organization tab to show the organizational chart.
Teams
Teams is a Microsoft collaboration app that helps your team stay organized and have conversations—all in one place. You can set up meetings, place video conferences and calls, and talk through chat.
How to schedule a meeting within Teams.
When you want to schedule a meeting within the Teams app.
1) In Teams, select Calendar  view.
view.
![]()
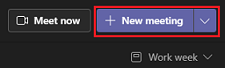
2) In the top right corner, select +New Meeting
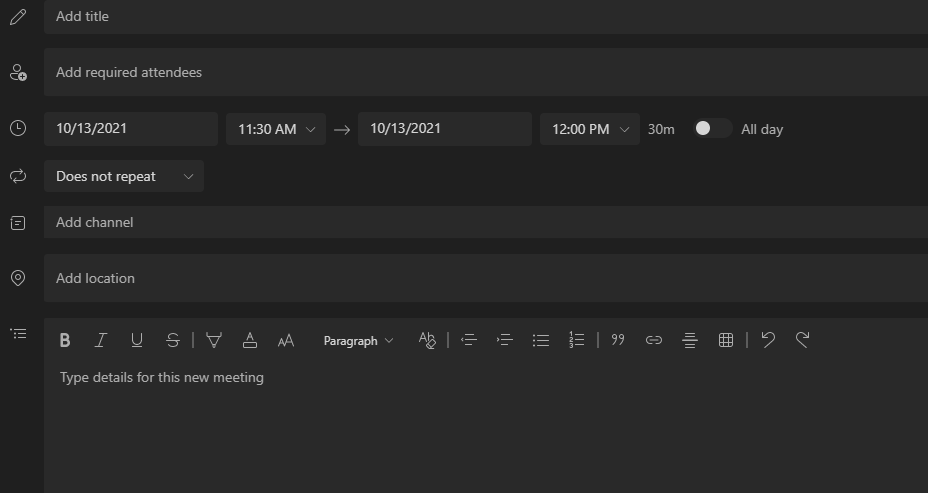
3) Fill out all information that is needed such as attendees and date.
4) Select Save in the top right corner.
![]()
You can also choose ![]() if you want to start a meeting right away instead of scheduling it for later.
if you want to start a meeting right away instead of scheduling it for later.
How to schedule Teams meetings in Outlook.
When you need to create Team meetings in your Outlook calendar.
Outlook on the Desktop
1) Open Outlook and switch to the Calendar view.

2) Select New Teams Meeting at the top of the view.
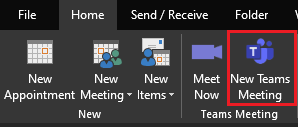
Note: Even if you begin by selecting New Meeting or New Appointment, you can make it a Teams meeting by selecting Teams Meeting at the top of the new event form.
3) Add your invitees to the Required or Optional field(s)—you can even invite entire contact groups (formerly known as distribution lists).
4) Add your meeting subject, location (if applicable), start time, and end time.
5) Create your message.
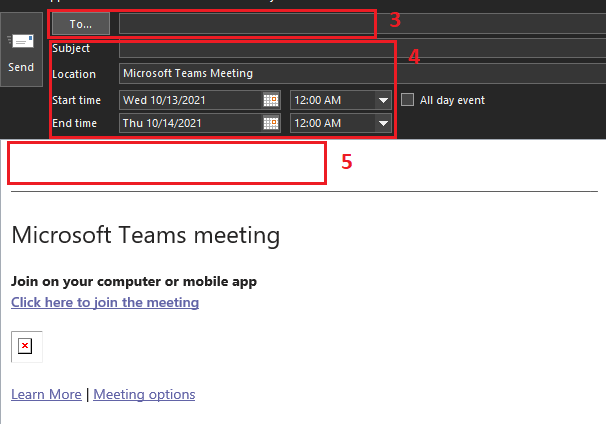
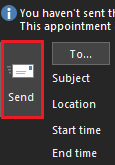
6) Select Send.
Note: The Teams meeting join details are added to the meeting invite automatically.
If you don’t see the New Teams Meeting icon in the desktop version of Outlook, the Teams add-in for Outlook might not be installed properly. Please submit a ticket in the Helpdesk.
Outlook on the Web
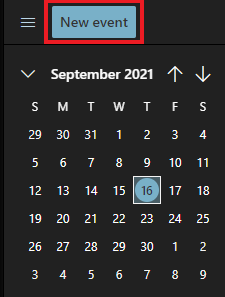
1) Open Outlook webpage and switch to the Calendar view.
![]()
2) Click on New event
3) In the new event form, select the Teams meeting toggle to turn it on.
4) Fill out information as needed
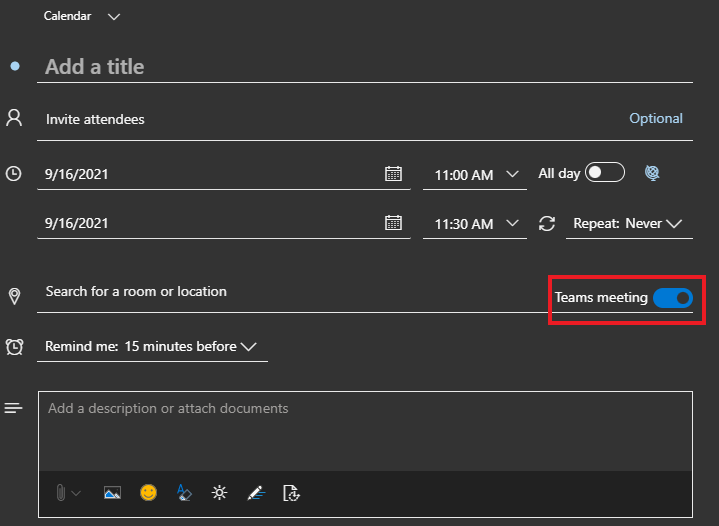
5) Click Save
![]()
How to set up Breakout Rooms in Teams
When you need to create smaller rooms inside a Teams meeting
Breakout rooms are a great way for an organizer of a Teams meeting to split attendees into multiple online rooms for discussion and collaboration in small groups.
This How to use breakout rooms in Teams meetings guide goes over how to create a breakout room and join one.
How to set up Microphone/Speakers in Teams.
To setup or change how you talk and listen in Teams.
Pre-Call Set Up
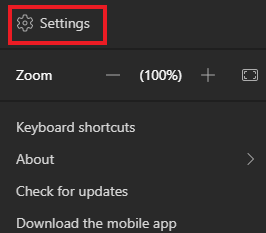
1) Select Settings and more  to the left of your profile picture at the top of the app, then select Settings>Devices.
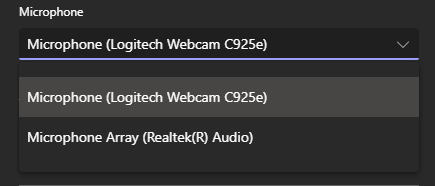
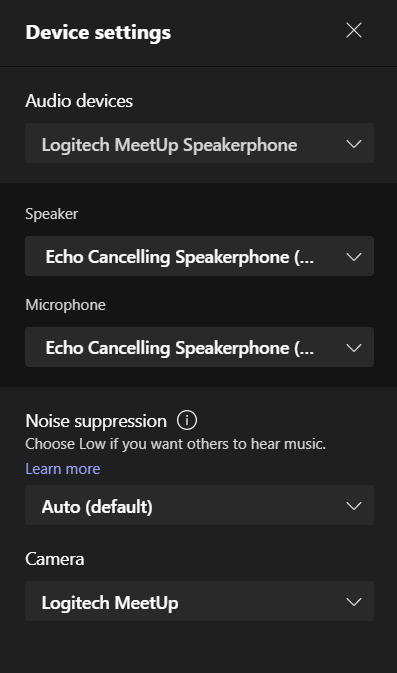
2) You will see a several options with drop down selections.
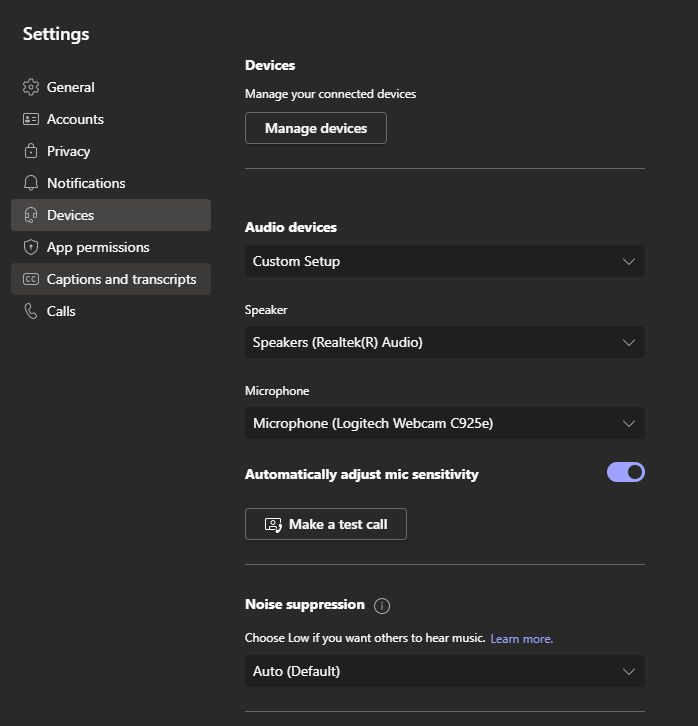
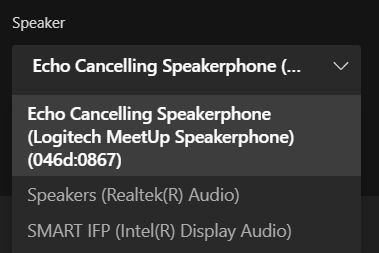
3) Click on the drop down menu for the device you wish to change.
4) Select your choice.
5) Optional: Make a test call to hear how your devices sound.
Set Up When Joining A Call
1) In the waiting room before a call, click on Open Device Settings.
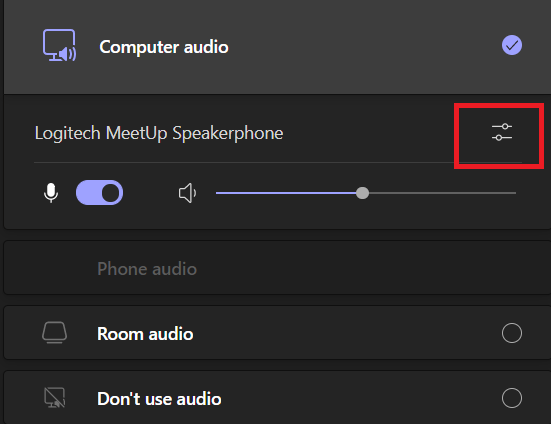
2) You will see various setting options depending on your computer set up.
3) Click on the drop down menu for the device you wish to change.
4) Select your choice.
5) Click on Join now to enter the call.
![]()
Smartboards are labeled as SMART IFP. Large cameras in select rooms are Logitech MeetUp.
Sharing Teams Recordings
When you want to share your Team recordings.
To share a recording from Team through OneDrive.
1.) Log into GatorMail like normal and click on the 9 dots at the top of the webpage.
![]()
2.) Go to OneDrive
3.) Find the Recording you wish to share. When hovering over the name of the file, click on the curved arrow icon
![]()
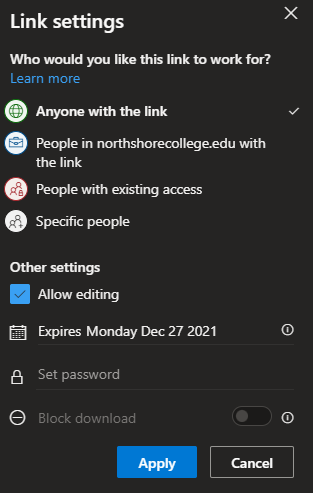
4.) Click on the Anyone with the link can edit.
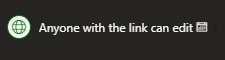
5.) A selection of options will appear. Here you will make your adjustments such as:
- Who will have access to the link.
- When the link will expire.
- Any passwords you wish to have enabled
- If editing is allowed.
Note: Per policy, all links will expire after 90 days if the Anyone with the link options is chosen. You will have to resend the link if you wish for someone to continue to have access. This does not apply to the to the other access options.
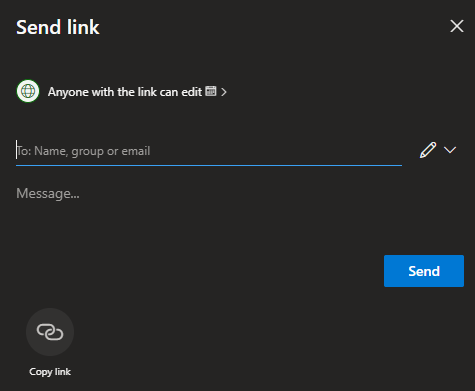
6.) Select Apply.
7.) Add the people you wish to send the link too. If they are within the college system then you can search by typing their name, otherwise add their email.
Select Send.
Recovering a Recording that appears to be missing.
1.) Go to OneDrive after signing into GatorMail.
2.) Click on Recycle Bin.
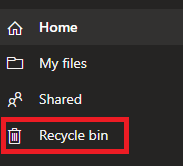
3.) Right click on the item you wish to restore.
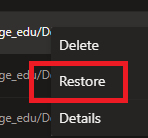
4.) Your recording or file will be returned to the proper location.
Wifi/Internet
Guest wireless internet (WiFi)
The NTCC guest wireless internet is available for all students and guests, and personal devices of employees. It should not be used for devices owned by NTCC.
Wireless internet coverage covers most of the interior of all NTCC campuses and sites, as well as limited areas in NTCC campus parking lots. Outdoor coverage generally covers the first couple rows of parking lots. We are in the process of expanding indoor coverage and tuning outdoor coverage.
Wireless settings
- Wireless network name: NTCC Guest
- Password: gogators (all lowercase, no spaces)
To offer the best experience, the guest wireless is delivered via 5Ghz wireless only. Most computers and mobile devices made in the last 10 years should be compatible, but compatibility with your device cannot be guaranteed. If your personal computer has issues connecting to the wireless, you can check a laptop out from Student Services.
Important Disclaimers
Wireless internet is provided at a "best-effort" level. While NTCC IT strives to provide complete indoor and outdoor coverage, there may be areas where there is not sufficient coverage to provide a usable internet connection.
Some user's personal devices may not work on the guest wireless internet. NTCC IT provides NO support for personal devices for any reason
VPNs will not work on the NTCC Guest wifi. Per Louisiana State Office of Information Technology rules, all ports not directly related to web browsing (ports 80 and 443) are blocked. NTCC IT cannot unblock any other services. This includes both corporate VPNs and personal/privacy VPNs. (Nord, PIA, etc.)
You MUST accept and use the DNS server provided by the NTCC network DHCP server. All other DNS servers such as Google, (8.8.8.8, 8.8.4.4) Cloudflare, (1.1.1.1) or any others will result in your device not having internet.
All websites visited are logged. Only the URLs visited are logged. The content of the page or data you enter is not logged.
Many non web-based email clients will not work
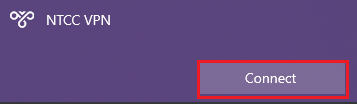
NTCC VPN
When not on one of NTCC's campuses, you should always connect to the NTCC VPN. Connecting to the VPN permits access to many resources and ensures that your computer gets the latest updates and security settings.
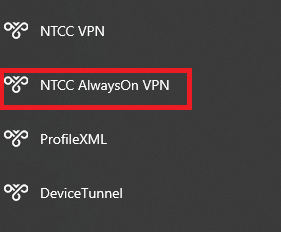
NTCC has 2 VPNs, one is manual while the other is automatic. The NTCC AlwaysOn VPN is the automatic one, and the NTCC VPN is the manual one. Both are accessible from the network system tray icon by the clock.
NOTE: You MUST be connected to the Internet to use the VPN, such as home WiFi.
Automatic connection to NTCC AlwaysOn VPN
- This VPN should automatically connect whenever you are off campus and connected to a Wifi. If you do not see this connect, please try the manual version.
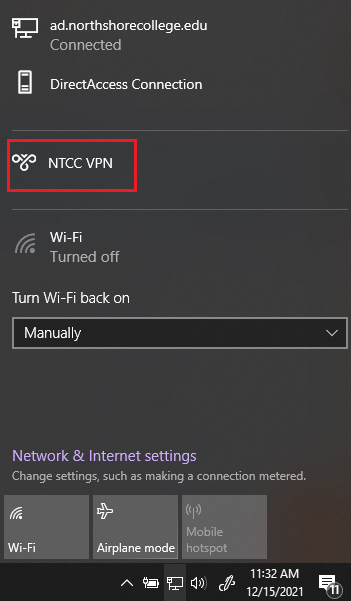
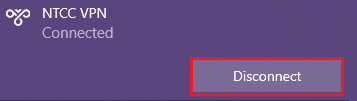
Connecting to the NTCC VPN (manual)
-
Click on the Internet/WiFi icon at the bottom of your taskbar.
 or
or 
How to connect to a cellular hotspot.
When you need to connect to your cellphone's hotspot.
To connect to the hotspot:
-
Set up the hotspot on your cellular device. Follow your device's guide and make sure you confirm with your cellular provider that your plan allows for hotspots.
- On your laptop, select the option to connect to Wi-Fi.
- Locate your hotspot's name in the Wi-Fi list.
- Connect to your hotspot like you would any Wi-Fi connection.
NOTE:
The Mobile Hotspot 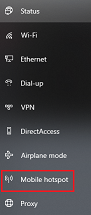 option in Window's Network & Internet setting is NOT use to connect to your cellular hotspot. This is used to turn your laptop into a hotspot. College laptops do not allow this option and are correctly blocked.
Forgetting previous WiFi.
Occasionally when you are unable to connect to a WiFi network, it may be do to your device having to many saved WiFi connections. You can delete networks (such as hotels and airports) that are no longer in use to free up space.
1.) Open up Network and Internet settings
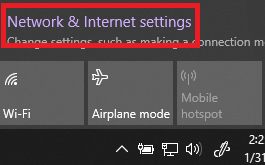
2.) Click on WiFi
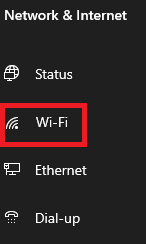
3.) Click on Manage known networks
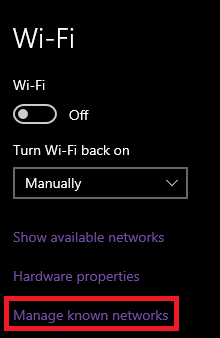
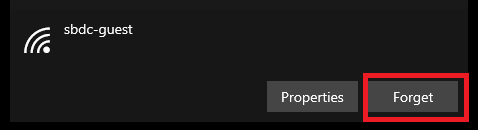
4. Select the WiFi Network you wish to remove then click Forget.
How to find Shared Drives.
If you cannot locate your shared drives, or if the shared drives appear to be missing.
1) Select the File Explorer icon at the bottom of your taskbar.
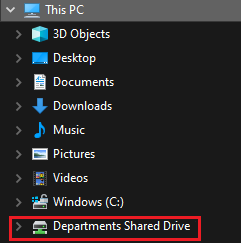
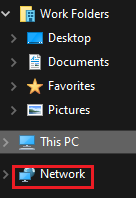
2) Select This PC or select > to expand it.
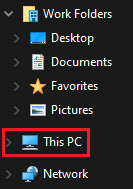
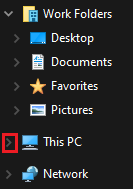
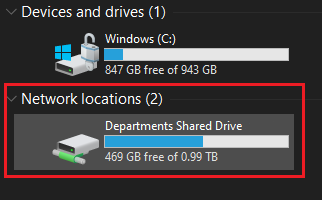
If you selected to expand This PC it will show up near the bottom of the list.
NOTE: The section labeled NETWORK is NOT connected to the shared drives and is NOT how to access the drives. Please do not try to use this to access the shared drives.
What do I do once I get an IT purchase quote.
What happens after a purchase quote is given to you through the helpdesk.
-
After submitting a quote through the helpdesk, the IT staff will reach out to the appropriate vendor.
-
The IT staff will submit the quote in the helpdesk as a file that you can download.
-
Create the appropriate PO Coversheet to be turned in with the quote to your campus purchasing liaison.
-
Your purchasing liaison will submit the requisition for processing and approval.
- IT only submits purchase requests for certain situations that usually involve multi-campus orders.
- If you need to order something that is only used by you or your department, unless noted otherwise, you will have to do the purchase request. This includes items such as cables and lamp bulbs.
NOTE: If you submitted a helpdesk ticket for malfunctioning equipment that IT deems necessary to replace, no other ticket is needed. IT will submit the quote in the original ticket.
Restoring files and folders.
Most files and folders can be restored from previous dates/saves.
This is helpful if you made saves to a document that you need to fix or if you deleted a file from a folder that you need again.
Currently you can only restore from about 1 week prior.
1.) Select the file or folder you wish to restore.

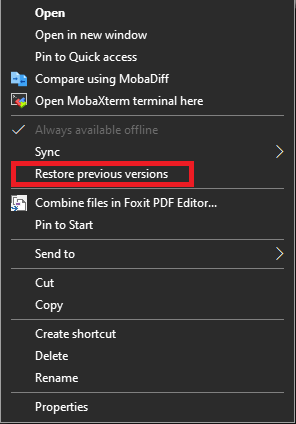
2.) Right click on the folder and select Restore previous versions.
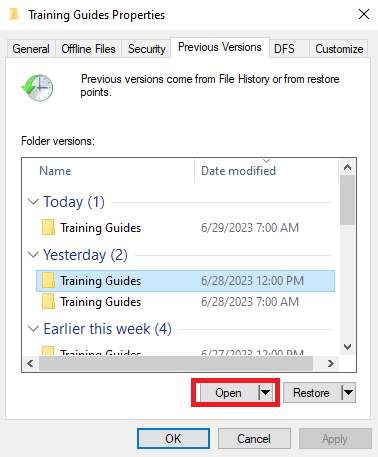
3.) Select when you want to restore from. Click Open.
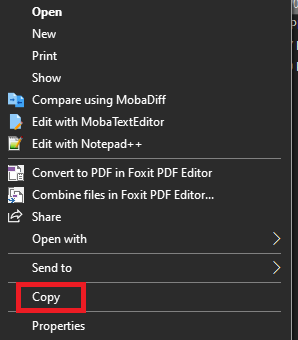
4.) Right click and copy/paste the file you to the folder you want to restore to.
5.) Click OK to exit the properties box.
Anything needed that is more than a week old will need a helpdesk ticket.
Helpdesk
Create helpdesk tickets in other departments' projects
Users who are agents for a helpdesk project may need to submit tickets to other helpdesk projects. (IT, facilities, etc.) The process to submit a helpdesk ticket is not the same as other users.
Steps
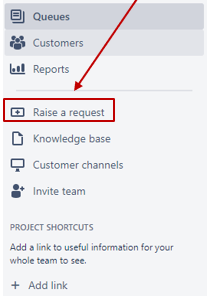
- In your project's screen, look to the left hand side and select Raise a request. If you have your screen side dash collapsed, it will look like the + in a box without the words.
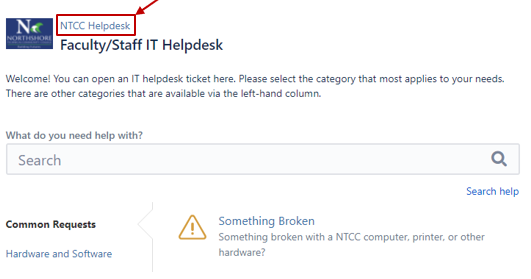
- Next it will bring you to a new webpage. Click on the NTCC Helpdesk at the top of the page.
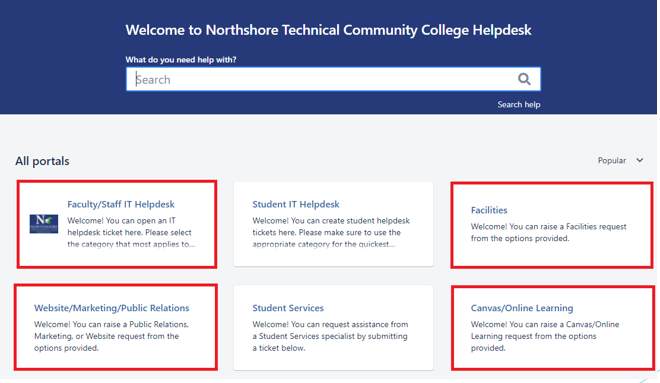
- It will bring you to the main Helpdesk page where you can choose the correct helpdesk for your ticket.
How to use the helpdesk.


