Printing and Copying
- Associate College ID with Papercut/Gatorprint
- How to use Follow-Me printer
- How to use the Kyocera Staple/Punch
- Teaching Assistant on Copiers
- Copier paper jam and other technical issues.
- Student Worker Printing
Associate College ID with Papercut/Gatorprint
Before you can use copy machines located on campus, you will need to associate your NTCC ID with Papercut/Gatorprint. The process is quick and easy and only has to be done once, unless you lose or damage your ID. Once you associate your card on one copy machine, you will be able to log into any copy machine Collegewide by simply tapping your card to the reader.
Warning
You MUST complete the process from start to finish in approximately 75 seconds. If you do not complete it in the required timeframe, you will not get the success message at the end and will be back at the main screen for the copier. If this happens, you must complete the entire process over again.
Step-by-step guide
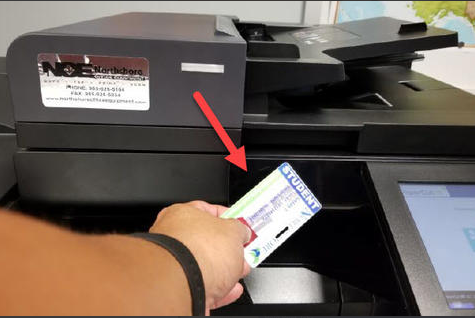
- Tap your student ID card to the student copier reader located to the left of the display screen. There should be a red light visible where you should tap your card.
- At the prompt to enter your NTCC email username and password, enter everything before the @ sign in your NTCC email (i.e. johndoe) and your NTCC email password. Please note, that the username is not case sensitive, but the password is.
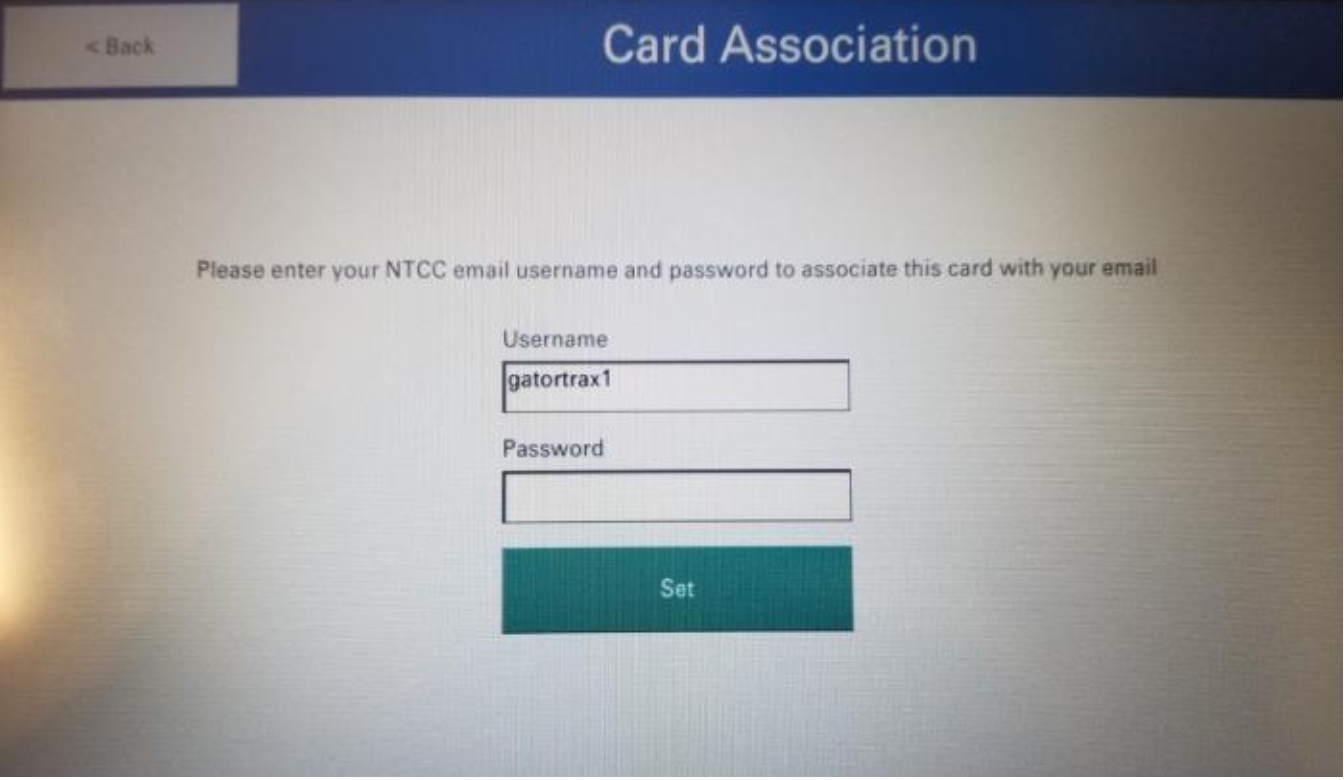
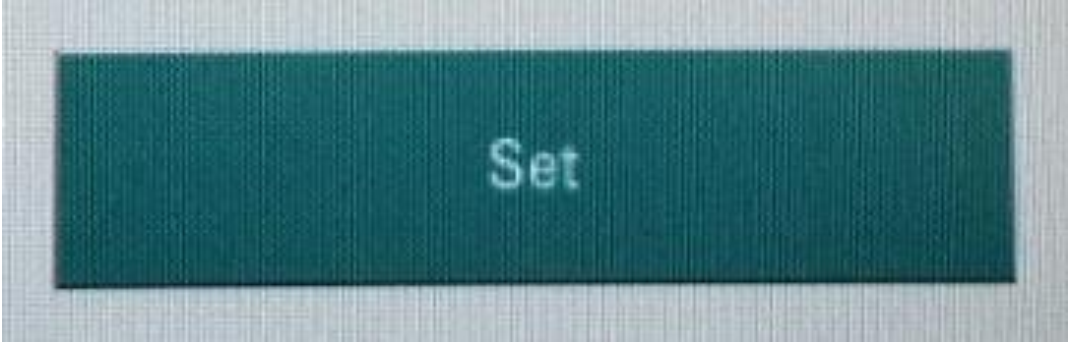
- Tap the green Set button
- You will then see a message stating "Your card has been associated with your user account." You can now log into any copier Collegewide just by tapping your card. If you did not receive the "Your card has been associated with your user account" message, you did not enter your username and password quickly enough and must start the process from the beginning.
How to use Follow-Me printer
All copiers at the Lacombe, Hammond, Livingston, Florida Parishes, and Connect to Success campuses are configured for Follow-Me printing. The copier in Administration, Health Sciences, and the Learning Commons at Sullivan campus is also equipped. The copier in the shop building and Student Services currently do not support Follow-Me
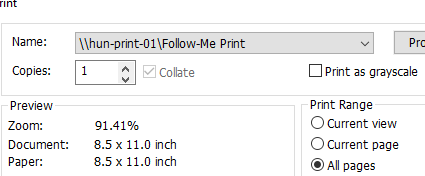
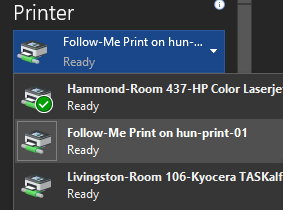
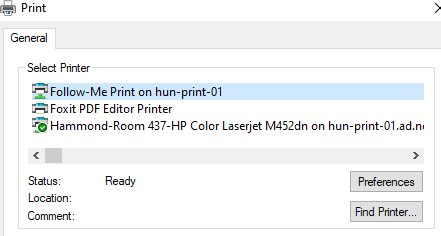
1.) When ready to print, use the drop down menu to select Follow-Me Print. This acts just like every other printer when it comes to sending the print job to a printer.
2.) Scan your ID card on any printer/copier that allows you to scan your ID card. You will need your ID card to allow the print job to be release to your chosen machine.
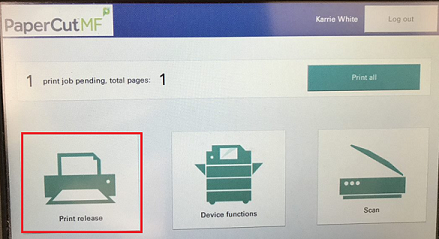
3.) On your options screen, select Print release.
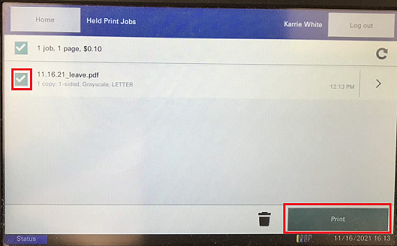
4.) Select the print job you wish to print and then select Print. Don't forget to logout!
Note: You can have multiple jobs sent and choose which ones you want to print. This can be very handy in situations where confidentiality is needed as it allows you to print only when you are at that copier.
If you get the PCL error after printing, try printing without duplexing (back and front) and staples. Follow-me sometimes has issues handling these requests.
How to use the Kyocera Staple/Punch
Kyocera copiers use special staples. Please do not try to load any other kind of staples.
On the Kyocera physical copier.
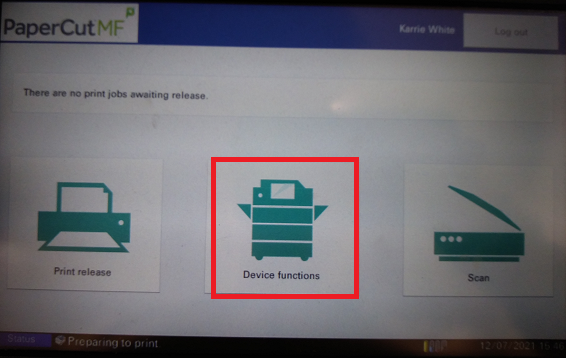
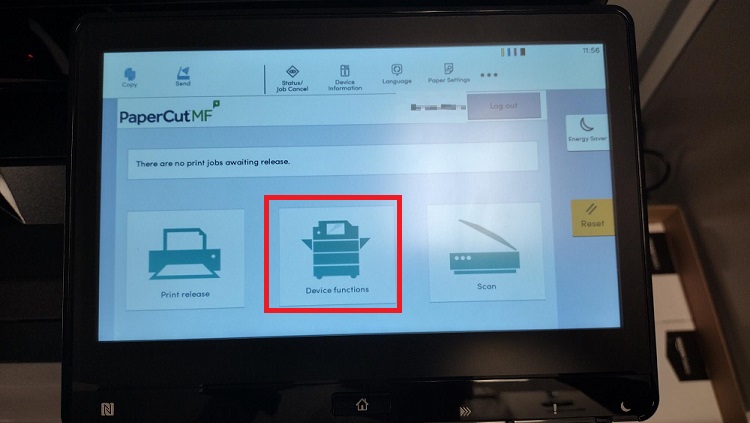
1.) Scan your ID card to access the print screen.
2.) Select Device Functions and go through the prompts.
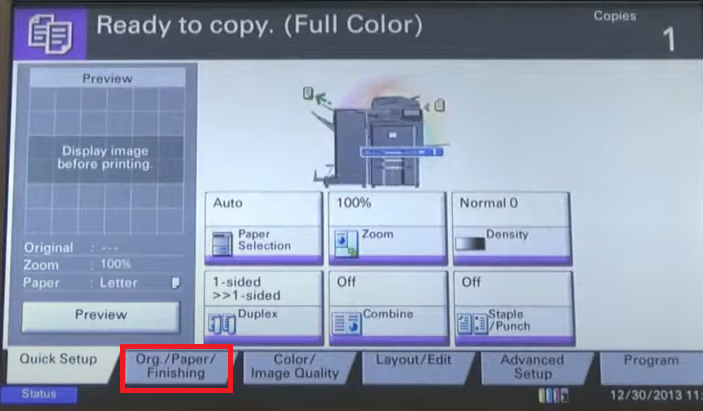
3. Select the Org./Paper/Finisher Tab.
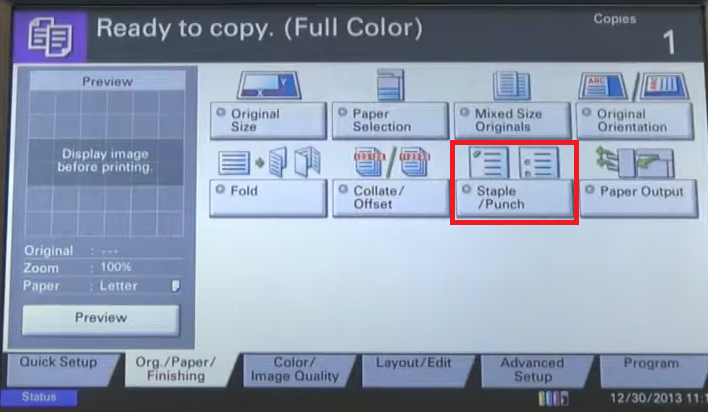
4. Select Staple/Punch function.
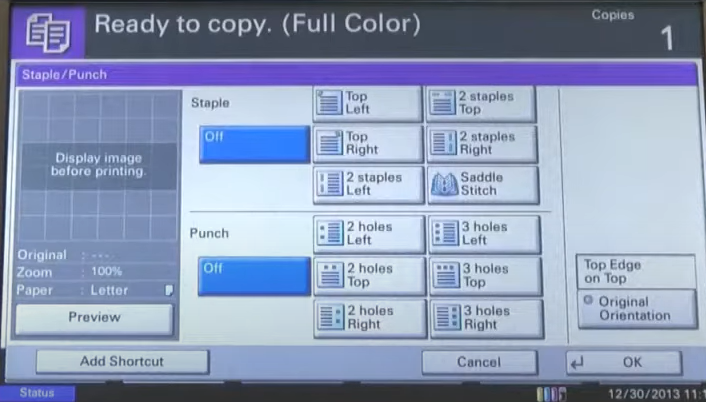
5. For staples: Select staple location. For hole punch: Select hole punch location. Both of these would depend on where you would like the staple/punch to go.
6. Select OK
7. Place originals in the document processor and press Start.
On the printer settings in the computer.
1.) When you go to print, select Printer Preference before you print.
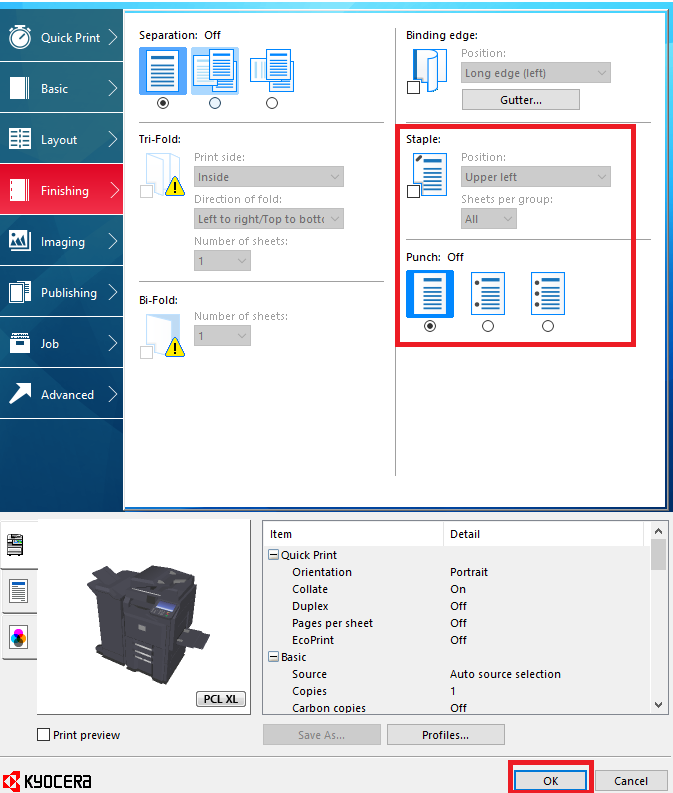
2.) When the Kyocera printer preference screen pop ups, click on Finishing.
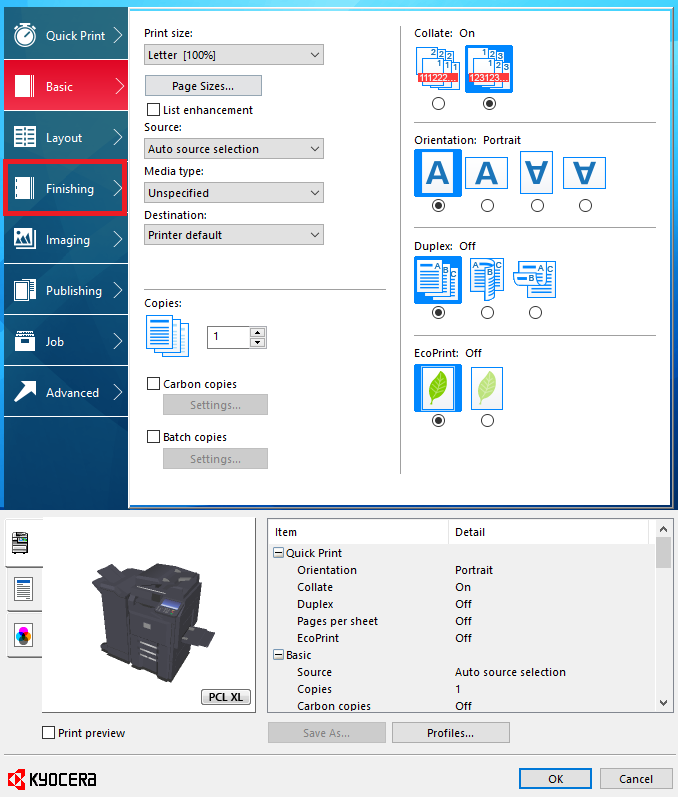
3. Choose your options for punch holes or staples. You have to enable the check box for staples if you want to use it.
4. Click OK and then print as normal.
Teaching Assistant on Copiers
How to find Teaching Assistant on the new copier.
1.) Use your badge to sign into the copier.
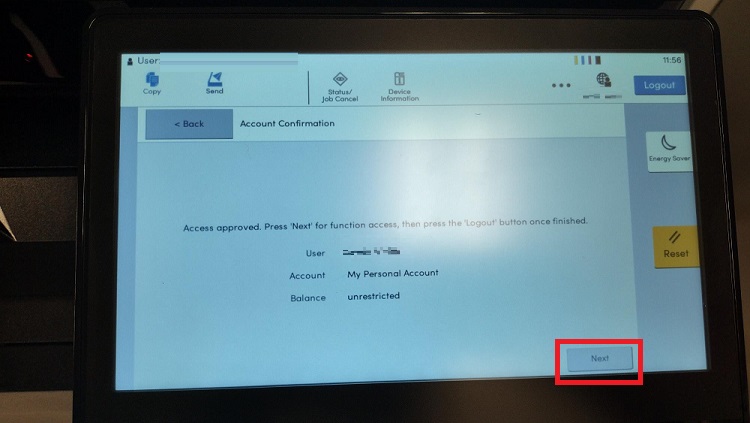
2.) Select Device Functions.
3. Select Next.
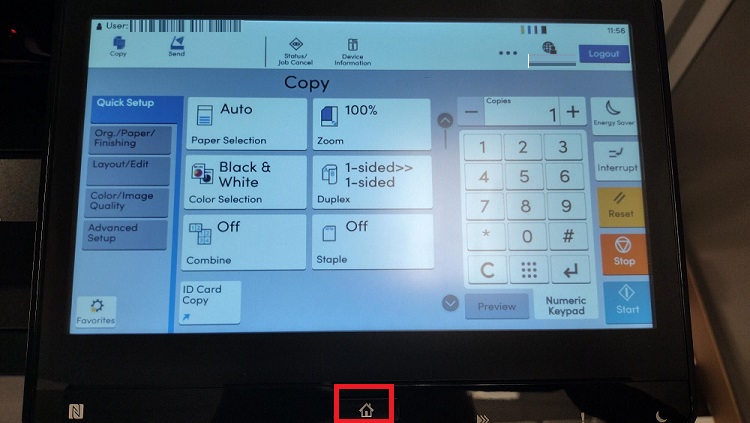
4. Select the Home button at the bottom of the screen. It is a physical button.
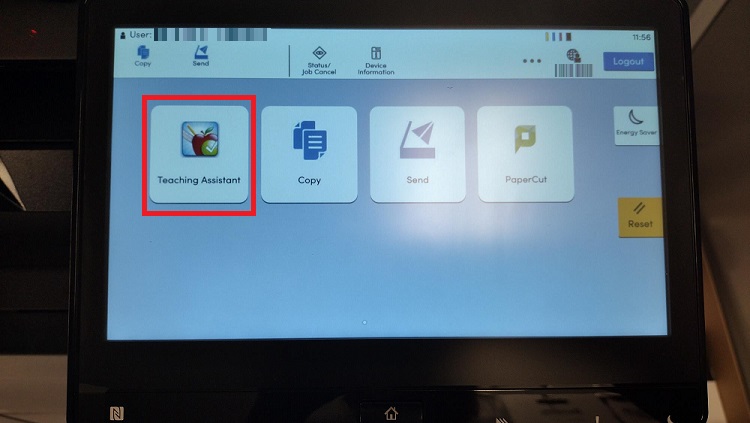
5.) Select Teaching Assistant.
Copier paper jam and other technical issues.
-
For any issue relating to the Kyocera copiers, call the number for Northshore Office Equipment listed on the silver tag on the front of the copy machine. NTCC IT does not service the copy machines.
-
If it is an issue using your ID badge to sign in or scans not sending, please submit a helpdesk ticket. Papercut service is the only function on the copiers that NTCC IT will work to correct.
Student Worker Printing
- When printing as a student worker, you must make sure Papercut is showing. You may have to click Run on a box that ask for Papercut to run.
- Print like normal, but send the print job to Follow-Me printer.
- Click on the option for Charge to shared account when the box pops up.

- Go to the copier and scan your ID card. Check out how to associate your student account with your ID.