Add and use a signature in Foxit PDF Editor?
Using Foxit PDF Editor, which is installed on all NTCC employee computers, you can sign documents using your real signature. The application allows you to "stamp" your signature anywhere on PDFs, as well as type in free-form text such as the date. This allows you to sign forms without printing them and re-scanning.
Adding a signature to Foxit PDF Editor
- Using a clean piece of white copy paper, sign your signature as you want it to be. Use black or blue ink to ensure a high contrast between your signature and the paper
- Scan the signature, or take a picture of it with the camera on your cell phone. If using a scanner, make sure to set it to scan in 600 DPI mode; anything less will result in a blurry image. If you take a picture of it, try to make your signature take up the entire frame of the picture and use plenty of light. Make sure no shadows are visible
- Save the resulting image in your Pictures folder
- If you scanned it using a NTCC copy machine, open the PDF file and use snipping tool to crop just the signature out of the PDF and save the snip to your Pictures folder
- If you took a picture of your signature with your cell phone, email the picture to yourself, then save it to your Pictures folder
- Open a PDF using Foxit PDF Editor The exact PDF file doesn't matter at this point; Foxit just needs a PDF open before it will let you continue with these steps
Version 11
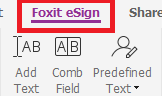
- Click on Foxit eSign
-
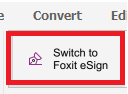
- Make sure the "Switch to Foxit eSign" shows. If it says "Switch to Ink", click on that to switch to show "Switch to Foxit eSign."
-
- Click on the import tab
- Click the upload signature button
- Find your signature file in the picker, then click open
- It will place your signature in the content block in the window. Verify it looks correct.
- Click OK


Applying your signature to PDF files
- Open the PDF you want to apply your signature to
- Click on the Home tab then Fill & Sign.
- Click on the picture of your signature. Now, when your cursor is over the PDF file, your signature will be visible
- Choose where you want to apply the signature and click the left mouse button. It will apply your signature.
- To resize your signature, click on the signature in the PDF you want to resize, then click on the square in the lower-right corner of your signature. Drag the mouse until the signature is properly sized. The application will keep your signature scaled properly
- To move your signature, click on your signature so that you see the outline. Then, click and drag the signature to the desired location.
- If you have to apply your signature to multiple locations, repeat steps 1-6 as needed.
Adding free-form text to PDF files
This is useful for when you need to sign and date a document. DO NOT use this procedure to add text to a document.
- Open the PDF you want to apply the text to
- Click on the Foxit eSign ribbon
- Click on either the Predefined Text dropdown, or the Add Text button
- If you are using Predefined text, choose the text you want to add, (most likely the date) then apply it to the document where needed. You can resize the text as needed
- If you are using the Add Text button, your mouse cursor turns into a text select icon. Click on the desired location in the document and start typing. You can move and resize the resulting text as needed when you have completed typing.